|   |
| |
When entering or updating the content of consumer face sheets, it is necessary to configure the fields and options in the various sections of the Consumer Face Sheet page, the most common of which are listed in alphabetical order below. (Other optional face sheet sections are also available for use in your AWARDS database; please see the Face Sheet - Implementation Request Form if you are interested in learning more.) Click a section name to view details on using that face sheet section, or scroll through the full page as needed.
|
|
![]() NOTE: As with most areas of AWARDS the face sheet is highly configurable. As a result, the face sheet sections you see may vary from those listed here. The content of those sections may also vary from those specifics detailed below.
NOTE: As with most areas of AWARDS the face sheet is highly configurable. As a result, the face sheet sections you see may vary from those listed here. The content of those sections may also vary from those specifics detailed below.
The Advance Directives section of the face sheet contains information on the consumer's behavior, strategies for support, and wishes in the event of his or her illness or death. To update this information, complete the following steps from the Consumer Face Sheet page:
![]() Symptoms at the onset of crisis - In this text box, type or make changes to information on any behaviors the consumer may exhibit when he or she begins to become unstable; for example, becoming angry or sleeping too little.
Symptoms at the onset of crisis - In this text box, type or make changes to information on any behaviors the consumer may exhibit when he or she begins to become unstable; for example, becoming angry or sleeping too little.
![]() Self help strategies to prevent a crisis - In this text box, type or make changes to information on any strategies that may help the consumer when he or she is becoming unstable; for example, talking to people he or she trusts.
Self help strategies to prevent a crisis - In this text box, type or make changes to information on any strategies that may help the consumer when he or she is becoming unstable; for example, talking to people he or she trusts.
![]() Interventions by others to prevent a crisis - In this text box, type or make changes to information on strategy staff and supporters should use when the consumer is becoming unstable; for example, visiting regularly or helping with chores.
Interventions by others to prevent a crisis - In this text box, type or make changes to information on strategy staff and supporters should use when the consumer is becoming unstable; for example, visiting regularly or helping with chores.
![]() Hospital of choice - In this text box, type or make changes to information on the hospital the consumer would prefer to be admitted to in the event that he or she must be hospitalized.
Hospital of choice - In this text box, type or make changes to information on the hospital the consumer would prefer to be admitted to in the event that he or she must be hospitalized.
![]() Funeral home of choice - In this text box, type or make changes to information on the funeral home the consumer would prefer to use in the event of his or her death.
Funeral home of choice - In this text box, type or make changes to information on the funeral home the consumer would prefer to use in the event of his or her death.
![]() Burial wishes - In this text box, type or make changes to information on the consumer's burial wishes in the event that he or she dies while in the program.
Burial wishes - In this text box, type or make changes to information on the consumer's burial wishes in the event that he or she dies while in the program.
The process of updating advance directives information is now complete.
Return to the top of the page.
The Allergy Info section of the face sheet contains information on the consumer's current allergies, if any. To update this information, complete the following steps from the Consumer Face Sheet page:
![]() TIP: Only active/current allergies are displayed on the face sheet in report mode; however, all allergy records may be updated from this section of the face sheet in data entry mode.
TIP: Only active/current allergies are displayed on the face sheet in report mode; however, all allergy records may be updated from this section of the face sheet in data entry mode.
![]()
![]() Add a new allergy record - To do so, click the Add New link on the upper-left side of the index. The Allergies - Data Entry page is displayed. Configure the fields and options on this page as necessary, including "Substance," "Onset Date," and "Status," and then continue with step 3.
Add a new allergy record - To do so, click the Add New link on the upper-left side of the index. The Allergies - Data Entry page is displayed. Configure the fields and options on this page as necessary, including "Substance," "Onset Date," and "Status," and then continue with step 3.
![]()
![]() Make changes to an existing allergy record - To do so, click the edit icon to the right of the associated record. The Allergies - Data Entry page is displayed, containing the records information. Make changes to the information as needed, and then continue with step 3.
Make changes to an existing allergy record - To do so, click the edit icon to the right of the associated record. The Allergies - Data Entry page is displayed, containing the records information. Make changes to the information as needed, and then continue with step 3.
![]() TIP: Allergies that were originally entered in Digital Rx must also be edited there, and are not available for data entry changes in AWARDS.
TIP: Allergies that were originally entered in Digital Rx must also be edited there, and are not available for data entry changes in AWARDS.
![]()
![]() Delete an allergy record - To do so, click the delete icon to the right of the associated record. A confirmation pop-up is displayed. Click OK to confirm the deletion, and the updated Allergies - Index page is then displayed with the deleted record removed. Continue with step 4.
Delete an allergy record - To do so, click the delete icon to the right of the associated record. A confirmation pop-up is displayed. Click OK to confirm the deletion, and the updated Allergies - Index page is then displayed with the deleted record removed. Continue with step 4.
![]() TIP: Allergies that were originally entered in Digital Rx must also be edited there, and are not available for data entry changes in AWARDS.
TIP: Allergies that were originally entered in Digital Rx must also be edited there, and are not available for data entry changes in AWARDS.
The process of updating allergy information is now complete.
![]() TIP: Consumer allergy information can also be maintained using the Medical module Allergies feature.
TIP: Consumer allergy information can also be maintained using the Medical module Allergies feature.
Return to the top of the page.
The Client File Cabinet section of the face sheet enables users to upload attachments. Uploaded documents are viewable and editable by all users with permission to access the face sheet to which they have been attached. For detailed information on using the Client File Cabinet feature, please click here to see the portion of Online Help that details uploading a document to a client's face sheet, viewing a document once uploaded, editing an attached document, and deleting an attached document.
![]() IMPORTANT! Files uploaded to client face sheets are also available from within the Client History Report and the Services-Individual module. As result, anyone with access to that report and/or module will have the ability to view and download these files.
IMPORTANT! Files uploaded to client face sheets are also available from within the Client History Report and the Services-Individual module. As result, anyone with access to that report and/or module will have the ability to view and download these files.
Return to the top of the page.
The Contacts Information section of the face sheet contains current contact records for the client; for example, emergency contact and next of kin. To update this information, complete the following steps from the Consumer Face Sheet page:
![]() TIP: The preview icon
TIP: The preview icon ![]() to the right of each record on this page is a shortcut to a printable, read-only report version of the corresponding contact record. When the icon is clicked, the record is opened in a second window. Close the window when viewing is complete.
to the right of each record on this page is a shortcut to a printable, read-only report version of the corresponding contact record. When the icon is clicked, the record is opened in a second window. Close the window when viewing is complete.
At this time, complete one or more of the following data entry tasks as needed:
![]()
![]() Add a new contact record - To do so, click the Add New link in the upper-left corner of the index. The Contacts - Data Entry page is displayed. Configure the fields and options on this page as necessary, and then click CONTINUE to save the new contact record. The updated Contacts - Index page is displayed. The process of adding a new contact record is now complete.
Add a new contact record - To do so, click the Add New link in the upper-left corner of the index. The Contacts - Data Entry page is displayed. Configure the fields and options on this page as necessary, and then click CONTINUE to save the new contact record. The updated Contacts - Index page is displayed. The process of adding a new contact record is now complete.
![]() TIP: For more information on each contact field/option available on the data entry page, see Contact Information Fields / Options.
TIP: For more information on each contact field/option available on the data entry page, see Contact Information Fields / Options.
![]()
![]() Make changes to an existing contact record - To do so, click the edit icon to the right of the record to be edited, or click the contact's name. The Contacts - Data Entry page is displayed, containing the selected contact's information in two sections:
Make changes to an existing contact record - To do so, click the edit icon to the right of the record to be edited, or click the contact's name. The Contacts - Data Entry page is displayed, containing the selected contact's information in two sections:
![]() Contact Information - To make changes or additions to the information in the top portion of the contact record, click Data Entry. An updateable version the Contacts - Data Entry page is displayed. Make changes and additions to the information on this page as needed, and then click CONTINUE to save the record.
Contact Information - To make changes or additions to the information in the top portion of the contact record, click Data Entry. An updateable version the Contacts - Data Entry page is displayed. Make changes and additions to the information on this page as needed, and then click CONTINUE to save the record.
![]() Contact Method Information - To make additions or changes to the contact methods for this contact, use the Add New link, or the edit and delete icons, respectively.
Contact Method Information - To make additions or changes to the contact methods for this contact, use the Add New link, or the edit and delete icons, respectively.
![]() TIP: For more information on each contact field/option available in either portion of the data entry page, see Contact Information Fields / Options.
TIP: For more information on each contact field/option available in either portion of the data entry page, see Contact Information Fields / Options.
Once work with the contact record has been completed, click Contacts Index to return to the updated Contacts - Index page, or use one of the other available navigation buttons as needed. The process of updating an existing contact record is now complete.
![]()
![]() Delete a contact record - To do so, click the delete icon to the right of the record to be deleted. A confirmation pop-up is displayed. Click Ok to confirm the deletion. The updated Contacts - Index page is displayed. The process of deleting a contact record is now complete.
Delete a contact record - To do so, click the delete icon to the right of the record to be deleted. A confirmation pop-up is displayed. Click Ok to confirm the deletion. The updated Contacts - Index page is displayed. The process of deleting a contact record is now complete.
The process of updating contacts information is now complete.
Return to the top of the page.
The Demographic Data section of the face sheet contains personal information on the consumer. To update this information, complete the following steps from the Consumer Face Sheet page:
![]() TIP: If this consumer is in a day program and external housing information is to be updated from the face sheet demographic data section, this must be done before updating any other demographic information.
TIP: If this consumer is in a day program and external housing information is to be updated from the face sheet demographic data section, this must be done before updating any other demographic information.
![]() First Name - In this field, type or make changes to the consumer's first name.
First Name - In this field, type or make changes to the consumer's first name.
![]() Middle Name - In this field, type or make changes to the consumer's middle name.
Middle Name - In this field, type or make changes to the consumer's middle name.
![]() Last Name - In this field, type or make changes to the consumer's last name.
Last Name - In this field, type or make changes to the consumer's last name.
![]() Alias - In this field, type or make changes to the alias by which the consumer may be known, if applicable.
Alias - In this field, type or make changes to the alias by which the consumer may be known, if applicable.
![]() Birth Date - In this field, type or make changes to the consumer's birthday (using mm/dd/yy format).
Birth Date - In this field, type or make changes to the consumer's birthday (using mm/dd/yy format).
![]() NOTE: The consumer's birthday defaults to the value entered for him or her during intake or admissions processing.
NOTE: The consumer's birthday defaults to the value entered for him or her during intake or admissions processing.
![]() Social Security # - In this field, type or make changes to the consumer's social security number (using nnn-nn-nnnn format).
Social Security # - In this field, type or make changes to the consumer's social security number (using nnn-nn-nnnn format).
![]() NOTE: The consumer's social security number defaults to the value entered for him or her during intake or admissions processing.
NOTE: The consumer's social security number defaults to the value entered for him or her during intake or admissions processing.
![]() Gender Identity - Click this drop-down arrow and select the gender with which the consumer identifies.
Gender Identity - Click this drop-down arrow and select the gender with which the consumer identifies.
![]() NOTE: The consumer's gender defaults to the value selected for him or her during intake or admissions processing.
NOTE: The consumer's gender defaults to the value selected for him or her during intake or admissions processing.
![]() Address / Phone / Move In Date & Update External Housing Info - These fields contain the current address and phone number of the consumer. This information defaults from one of two places:
Address / Phone / Move In Date & Update External Housing Info - These fields contain the current address and phone number of the consumer. This information defaults from one of two places:
![]() The consumer's agency residence program unit/bed assignment - If the consumer is in an agency residential program, the address information in the face sheet defaults to his or her address and residence unit/bed assignment at that program. This information is read-only and cannot be updated from the face sheet.
The consumer's agency residence program unit/bed assignment - If the consumer is in an agency residential program, the address information in the face sheet defaults to his or her address and residence unit/bed assignment at that program. This information is read-only and cannot be updated from the face sheet.
![]() TIP: The consumer's phone number information can be updated from within the Housing module. For more information, please see Updating Resident Phone Numbers.
TIP: The consumer's phone number information can be updated from within the Housing module. For more information, please see Updating Resident Phone Numbers.
![]() TIP: Residence unit "swaps" can also be completed from within the Housing module. For more information, please see Swapping Residence Units.
TIP: Residence unit "swaps" can also be completed from within the Housing module. For more information, please see Swapping Residence Units.
![]() The consumer's external housing record - If the consumer is not in an agency residential program, the address information in the face sheet defaults to that entered in his or her external housing record (in the Housing module). This information can be accessed and updated from either the Housing module or the face sheet using the Update External Housing Info feature. To do so, complete the following steps from the Consumer Face Sheet page:
The consumer's external housing record - If the consumer is not in an agency residential program, the address information in the face sheet defaults to that entered in his or her external housing record (in the Housing module). This information can be accessed and updated from either the Housing module or the face sheet using the Update External Housing Info feature. To do so, complete the following steps from the Consumer Face Sheet page:
1) Click Update Demographic Data. The Update Demographic Data page is displayed.
2) Click Update External Housing Info. The consumer's external housing record is displayed on the Current External Housing Information page.
3) Make changes or additions to the information on this page as necessary. For more information, see Working with External Housing Records.
4) When all changes have been made, click UPDATE. The external housing information is saved and the Consumer Face Sheet page is re-displayed.
5) Other demographic data changes can now be made as necessary.
The process of updating external housing information is now complete.
![]() Race - Click one or more checkboxes to specify the consumer's race.
Race - Click one or more checkboxes to specify the consumer's race.
![]() Ethnicity - Click this drop-down arrow and select the consumer's ethnicity.
Ethnicity - Click this drop-down arrow and select the consumer's ethnicity.
![]() TIP: If "Latin American" was not selected as the consumer's race, "Not Latin" should be selected as his or her ethnicity.
TIP: If "Latin American" was not selected as the consumer's race, "Not Latin" should be selected as his or her ethnicity.
![]() Primary Language - Click this drop-down arrow and select the consumer's primary language.
Primary Language - Click this drop-down arrow and select the consumer's primary language.
![]() Citizen - Click this drop-down arrow and select the consumer's status as an American citizen. Available selections are "US Citizen," "Registered Alien," and "Undocumented Alien."
Citizen - Click this drop-down arrow and select the consumer's status as an American citizen. Available selections are "US Citizen," "Registered Alien," and "Undocumented Alien."
![]() Alien Registration - If "Registered Alien" was selected under the Citizen option, type or make changes to the consumer's alien registration number in the Alien Registration field.
Alien Registration - If "Registered Alien" was selected under the Citizen option, type or make changes to the consumer's alien registration number in the Alien Registration field.
![]() Religion - Click this drop-down arrow and select the consumer's religion.
Religion - Click this drop-down arrow and select the consumer's religion.
![]() Roster Status Update - Active/Inactive - For programs configured to use the active/inactive status feature, the Roster Status Update feature enables you to clear up inconsistencies between the current active/inactive status and the last attendance date, from data entered under Group Activities and Program Attendance in the Reception Desk module. The active/inactive toggle is displayed if AWARDS finds an inconsistency where the status is active and the last attendance date is more than 90 days ago, or if the status is inactive and the last attendance date is within the last 90 days. (There is a behind-the-scenes option to change this interval to 30, 31, 60 or 180.)
Roster Status Update - Active/Inactive - For programs configured to use the active/inactive status feature, the Roster Status Update feature enables you to clear up inconsistencies between the current active/inactive status and the last attendance date, from data entered under Group Activities and Program Attendance in the Reception Desk module. The active/inactive toggle is displayed if AWARDS finds an inconsistency where the status is active and the last attendance date is more than 90 days ago, or if the status is inactive and the last attendance date is within the last 90 days. (There is a behind-the-scenes option to change this interval to 30, 31, 60 or 180.)
The process of updating demographic information is now complete.
Return to the top of the page.
The Diagnoses Data section of the face sheet contains information on the consumer's current diagnoses (those without resolution dates). To update this information, complete the following steps from the Consumer Face Sheet page:
The process of updating diagnoses data is now complete.
![]() TIP: Consumer diagnoses information can also be maintained using the Medical module Diagnoses feature.
TIP: Consumer diagnoses information can also be maintained using the Medical module Diagnoses feature.
Return to the top of the page.
The Entitlements section of the face sheet contains the consumer's entitlements information. To update this information, complete the following steps from the Consumer Face Sheet page:
The process of updating entitlements information is now complete.
![]() TIP: Entitlement information may also be accessed and updated using the Entitlements module Certified Entitlements feature.
TIP: Entitlement information may also be accessed and updated using the Entitlements module Certified Entitlements feature.
Return to the top of the page.
The Face Sheet Photo and Note section of the face sheet contains any notes to be included in the consumer's record, as well as a photo of the consumer if available.
Face Sheet Photos
To upload, replace, or remove a face sheet photo, complete the following steps from the Consumer Face Sheet page:
![]() Upload a Photo or Replace a Previously Uploaded Photo - To do so, click Choose File. The Open dialog box is displayed. Select the file to be uploaded, and then click OK. Click Upload Photo. The photo is uploaded and displayed on the Face Sheet Photo page and on the face sheet itself.
Upload a Photo or Replace a Previously Uploaded Photo - To do so, click Choose File. The Open dialog box is displayed. Select the file to be uploaded, and then click OK. Click Upload Photo. The photo is uploaded and displayed on the Face Sheet Photo page and on the face sheet itself.
![]() TIP: When selecting a photo file please keep in mind that it must be in .GIF, .JPG, or .PNG format, and that it must be no more than 2MB in size.
TIP: When selecting a photo file please keep in mind that it must be in .GIF, .JPG, or .PNG format, and that it must be no more than 2MB in size.
![]() Remove a Previously Uploaded Photo - To do so, click Delete Photo. A confirmation dialog box is displayed. Click OK to proceed with the deletion process. The photo is deleted and is no longer displayed on the Face Sheet Photo page or on the face sheet itself.
Remove a Previously Uploaded Photo - To do so, click Delete Photo. A confirmation dialog box is displayed. Click OK to proceed with the deletion process. The photo is deleted and is no longer displayed on the Face Sheet Photo page or on the face sheet itself.
The process of uploading, replacing, or removing a face sheet photo is now complete.
Return to the top of the page.
Face Sheet Notes
To add or make changes to a face sheet note, complete the following steps from the Consumer Face Sheet page:
The process of adding or updating a face sheet note is now complete.
Return to the top of the page.
To enter or update HMIS annual update information, complete the following steps from the Consumer Face Sheet page:
![]() NOTE: The HMIS Info portion of the face sheet is meant to be filled out annually. A history of the data for each data date is kept behind-the-scenes in AWARDS; however, only the most recent data is viewable.
NOTE: The HMIS Info portion of the face sheet is meant to be filled out annually. A history of the data for each data date is kept behind-the-scenes in AWARDS; however, only the most recent data is viewable.
![]() NOTE: When initially opened data in this portion of the face sheet defaults to that entered at intake, when applicable.
NOTE: When initially opened data in this portion of the face sheet defaults to that entered at intake, when applicable.
The process of entering or updating HMIS info is now complete.
![]() IMPORTANT! The HMIS Info portion of the face sheet includes a section of "HMIS Data History," designed to allow users to view, edit, or delete previous HMIS info updates.
IMPORTANT! The HMIS Info portion of the face sheet includes a section of "HMIS Data History," designed to allow users to view, edit, or delete previous HMIS info updates.
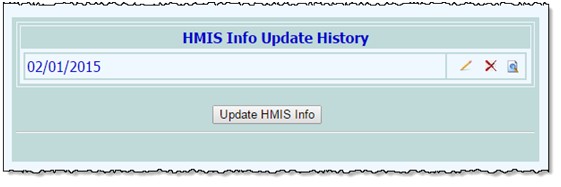
![]() To edit an HMIS Data History record, click the edit icon to the right of the record in question. The history opens in data entry mode. All fields except Effective Date can be edited. Click UPDATE to save the new information and return to the face sheet.
To edit an HMIS Data History record, click the edit icon to the right of the record in question. The history opens in data entry mode. All fields except Effective Date can be edited. Click UPDATE to save the new information and return to the face sheet.
![]() To delete an HMIS Data History record, click the delete icon to the right of the record to be removed. A pop-up confirmation is displayed. Click OK. The history is removed and the updated face sheet is displayed.
To delete an HMIS Data History record, click the delete icon to the right of the record to be removed. A pop-up confirmation is displayed. Click OK. The history is removed and the updated face sheet is displayed.
![]() To view a read-only report version of an HMIS Data History record, click the preview icon to the right of the record to be viewed. The record is displayed in a new browser window. When done viewing the record, close the window.
To view a read-only report version of an HMIS Data History record, click the preview icon to the right of the record to be viewed. The record is displayed in a new browser window. When done viewing the record, close the window.
Return to the top of the page.
The Hospitalization Information section of the face sheet contains information on any episodes of hospitalization for the consumer. To update this information, complete the following steps from the Consumer Face Sheet page:
![]() TIP: Only current hospitalization records displayed on the face sheet in report mode; however, all hospitalization records may be updated from this section of the face sheet in data entry mode.
TIP: Only current hospitalization records displayed on the face sheet in report mode; however, all hospitalization records may be updated from this section of the face sheet in data entry mode.
The process of updating hospitalization information is now complete.
![]() TIP: Hospitalization information can also be updated using the Hospital module Episodes feature.
TIP: Hospitalization information can also be updated using the Hospital module Episodes feature.
Return to the top of the page.
The Household Composition section of the face sheet contains information on the members of the consumer's household, including his or her children. To update this information, complete the following steps from the Consumer Face Sheet page:
The process of updating household composition information is now complete.
Return to the top of the page.
The Immunizations Info section of the face sheet contains information on the consumer's immunization history (if the optional immunizations functionality in AWARDS has been turned on in your database). To update this information, complete the following steps from the Consumer Face Sheet page:
![]()
![]() Add a new immunization record - To do so, click the Add New link on the upper-left side of the index. The Immunization - Data Entry page is displayed. Configure the fields and options on this page as necessary, including "Immunization Type," "Date," and so on, and then continue with step 3.
Add a new immunization record - To do so, click the Add New link on the upper-left side of the index. The Immunization - Data Entry page is displayed. Configure the fields and options on this page as necessary, including "Immunization Type," "Date," and so on, and then continue with step 3.
![]()
![]() Make changes to an existing immunization record - To do so, click the edit icon to the right of the associated record. The Immunization - Data Entry page is displayed, containing the records information. Make changes to the information as needed, and then continue with step 3.
Make changes to an existing immunization record - To do so, click the edit icon to the right of the associated record. The Immunization - Data Entry page is displayed, containing the records information. Make changes to the information as needed, and then continue with step 3.
![]()
![]() Delete an immunization record - To do so, click the delete icon to the right of the associated record. A confirmation pop-up is displayed. Click OK to confirm the deletion, and the updated Immunization - Index page is then displayed with the deleted record removed. Continue with step 4.
Delete an immunization record - To do so, click the delete icon to the right of the associated record. A confirmation pop-up is displayed. Click OK to confirm the deletion, and the updated Immunization - Index page is then displayed with the deleted record removed. Continue with step 4.
The process of updating immunization information is now complete.
![]() TIP: Consumer immunization information can also be maintained using the Medical module immunizations feature.
TIP: Consumer immunization information can also be maintained using the Medical module immunizations feature.
Return to the top of the page.
The Legal Data section of the face sheet contains legal, domestic violence, and trauma information for the consumer. To update this information, complete the following steps from the Consumer Face Sheet page:
![]() Arrests
Arrests
![]() Open Court Cases
Open Court Cases
![]() Domestic Violence History
Domestic Violence History
![]() Trauma History
Trauma History
The process of updating legal information is now complete.
Return to the top of the page.
The Medication Information section of the face sheet contains information on the consumer's current medications. To update this information, complete the following steps from the Consumer Face Sheet page:
The process of updating medication information is now complete.
![]() TIP: Consumer medication information can also be maintained using the Medical module Medication feature.
TIP: Consumer medication information can also be maintained using the Medical module Medication feature.
Return to the top of the page.
The Miscellaneous Information section of the face sheet contains additional personal information on the consumer, including education and employment information. To update this information, complete the following steps from the Consumer Face Sheet page:
![]() Veteran / Discharge Type - Click this drop-down arrow and select the consumer's status as a veteran. Available selections are "Not a Veteran," "Unknown Discharge Type," "Honorable Discharge," and "Not Honorable Discharge."
Veteran / Discharge Type - Click this drop-down arrow and select the consumer's status as a veteran. Available selections are "Not a Veteran," "Unknown Discharge Type," "Honorable Discharge," and "Not Honorable Discharge."
![]() Marital Status - Click thus drop-down arrow and select the consumer's current marital status.
Marital Status - Click thus drop-down arrow and select the consumer's current marital status.
![]() Education Level - Click this drop-down arrow and select the last grade level completed by the consumer. "01" represents first grade, "02" represents second grade, and so on. Available selections are "01" through "20."
Education Level - Click this drop-down arrow and select the last grade level completed by the consumer. "01" represents first grade, "02" represents second grade, and so on. Available selections are "01" through "20."
![]() Diploma - Click this drop-down arrow and select the highest degree/diploma received by the consumer, if any.
Diploma - Click this drop-down arrow and select the highest degree/diploma received by the consumer, if any.
![]() Employment Status - Click this drop-down arrow and select "Employed" or "Unemployed" to indicate whether the consumer is currently employed.
Employment Status - Click this drop-down arrow and select "Employed" or "Unemployed" to indicate whether the consumer is currently employed.
![]() NY/NY - Click this drop-down arrow and select "Yes" or "No" to indicate whether the consumer is NY/NY eligible.
NY/NY - Click this drop-down arrow and select "Yes" or "No" to indicate whether the consumer is NY/NY eligible.
![]() NOTE: This option is meant for use by NY-based customers whose clients may be NY/NY eligible.
NOTE: This option is meant for use by NY-based customers whose clients may be NY/NY eligible.
![]() NY/NY ID - If "Yes" was selected for the NY/NY option, type or make changes to the consumer's NY/NY ID in the NY/NY ID field.
NY/NY ID - If "Yes" was selected for the NY/NY option, type or make changes to the consumer's NY/NY ID in the NY/NY ID field.
The process of updating miscellaneous information is now complete.
Return to the top of the page.
Substance / Alcohol Use Information
The Substance / Alcohol Use section of the face sheet contains information on the consumer's history of drug and alcohol use. To update this information, complete the following steps from the Consumer Face Sheet page:
![]() Alcohol Use Disorder / Active / Sobriety Date - Click the Alcohol Use Disorder drop-down arrow and select "Yes" or "No" to indicate whether the consumer has a history of alcohol abuse. If "Yes" is selected for the Alcohol Use Disorder option, click the corresponding Active drop-down arrow and select "Yes" or "No" to indicate whether the alcohol use is occurring currently. If the consumer is not currently using alcohol but has in the past, in the Sobriety Date field, type or make changes to the sobriety date (using mm/dd/yy format).
Alcohol Use Disorder / Active / Sobriety Date - Click the Alcohol Use Disorder drop-down arrow and select "Yes" or "No" to indicate whether the consumer has a history of alcohol abuse. If "Yes" is selected for the Alcohol Use Disorder option, click the corresponding Active drop-down arrow and select "Yes" or "No" to indicate whether the alcohol use is occurring currently. If the consumer is not currently using alcohol but has in the past, in the Sobriety Date field, type or make changes to the sobriety date (using mm/dd/yy format).
![]() Substance Use Disorder / Active / Last Used Date - Click the Substance Use Disorder drop-down arrow and select "Yes" or "No" to indicate whether the consumer has a history of substance (chemical) use. If "Yes" is selected for the Substance Use Disorder option, click the corresponding Active drop-down arrow and select "Yes" or "No" to indicate whether the substance use is occurring currently. If the consumer is not currently using but has in the past, in the Last Used field, type or make changes to the date on which the consumer last used (using mm/dd/yy format).
Substance Use Disorder / Active / Last Used Date - Click the Substance Use Disorder drop-down arrow and select "Yes" or "No" to indicate whether the consumer has a history of substance (chemical) use. If "Yes" is selected for the Substance Use Disorder option, click the corresponding Active drop-down arrow and select "Yes" or "No" to indicate whether the substance use is occurring currently. If the consumer is not currently using but has in the past, in the Last Used field, type or make changes to the date on which the consumer last used (using mm/dd/yy format).
![]() Extensive Substance Abuse Info - The Extensive Substance Abuse Info feature is used to maintain more detailed information on the consumer's substance abuse history. To update this information, complete the following steps from the Update Substance Abuse Info page:
Extensive Substance Abuse Info - The Extensive Substance Abuse Info feature is used to maintain more detailed information on the consumer's substance abuse history. To update this information, complete the following steps from the Update Substance Abuse Info page:
1) Click Extensive Substance Abuse Info. The Substance Abuse Information page is displayed.
2) Make changes or additions to the information on this page as necessary. This information may include Problem Substances, Dependence / Abuse Continuum, and Placement Factors.
3) When all changes have been made, click SAVE. The extensive substance use information is saved, and the Update Substance Use Info page is re-displayed.
The process of updating extensive substance use info is now complete.
The process of updating substance / alcohol use information is now complete.
Return to the top of the page.
Support Service Contacts Information
The Support Services Contacts section of the face sheet contains contact information for the consumer's services contacts. To update this information, complete the following steps from the Consumer Face Sheet page:
![]() Role / Person - In the Person field, type or make changes to the name of the support service contact; for example, when adding or updating contact information for a therapist, type his or her name in the Therapist field. When entering an additional contact (where the role is not pre-defined), the role of the support services contact must also be entered. Do so by typing it in the Role field.
Role / Person - In the Person field, type or make changes to the name of the support service contact; for example, when adding or updating contact information for a therapist, type his or her name in the Therapist field. When entering an additional contact (where the role is not pre-defined), the role of the support services contact must also be entered. Do so by typing it in the Role field.
![]() TIP: When an additional contact is entered and the support services contacts information is saved, another blank additional contact will be available the next time the support services contacts are updated. In this way, unlimited additional contacts may be entered.
TIP: When an additional contact is entered and the support services contacts information is saved, another blank additional contact will be available the next time the support services contacts are updated. In this way, unlimited additional contacts may be entered.
![]() Authorizing Psychiatrist - If contact information is being entered for a CR program consumer's Authorizing Psychiatrist, type or make changes to his or her license number in the NYS License field, and type or make changes to the dates in the Next Authorization Due, Last Authorization Due, and Last Authorization Done fields (using mm/dd/yy format).
Authorizing Psychiatrist - If contact information is being entered for a CR program consumer's Authorizing Psychiatrist, type or make changes to his or her license number in the NYS License field, and type or make changes to the dates in the Next Authorization Due, Last Authorization Due, and Last Authorization Done fields (using mm/dd/yy format).
![]() TIP: For detailed information on the authorizing psychiatrist, click the Look Up License link next to the Authorizing Psychiatrist field. When clicked, a search is performed on the web site for the Office of the Professions at the New York State Education Department. A list of those professionals whose name matches that in the Authorizing Psychiatrist field is then displayed, at which time you can access more detailed license information about the professional.
TIP: For detailed information on the authorizing psychiatrist, click the Look Up License link next to the Authorizing Psychiatrist field. When clicked, a search is performed on the web site for the Office of the Professions at the New York State Education Department. A list of those professionals whose name matches that in the Authorizing Psychiatrist field is then displayed, at which time you can access more detailed license information about the professional.
![]() NOTE: In the event that a user updates authorizing support services contact information for a client, text will be shown on the page reminding the user to also update the contact's license number information, if applicable.
NOTE: In the event that a user updates authorizing support services contact information for a client, text will be shown on the page reminding the user to also update the contact's license number information, if applicable.
![]() Agency - In this field, type or make changes to the name of the agency at which the contact works.
Agency - In this field, type or make changes to the name of the agency at which the contact works.
![]() Phone - Click one or both drop-down arrows and select "Home," "Work," "Cell," "Beep," "Fax," or "TTY" to enter those numbers at which the contact can be reached. Type or make changes to the number(s) in the corresponding fields (using (nnn) nnn-nnnn format, followed by an extension if applicable).
Phone - Click one or both drop-down arrows and select "Home," "Work," "Cell," "Beep," "Fax," or "TTY" to enter those numbers at which the contact can be reached. Type or make changes to the number(s) in the corresponding fields (using (nnn) nnn-nnnn format, followed by an extension if applicable).
![]() Address - In this field, type or make changes to the address of the agency at which the contact works.
Address - In this field, type or make changes to the address of the agency at which the contact works.
![]() Email - In this field, type or make changes to the email address at which the contact can be reached.
Email - In this field, type or make changes to the email address at which the contact can be reached.
![]() As Of / End Date - In these fields, type or make changes to the date on which the consumer's relationship with this contact began, and if applicable, the date on which the relationship ended (using mm/dd/yy format).
As Of / End Date - In these fields, type or make changes to the date on which the consumer's relationship with this contact began, and if applicable, the date on which the relationship ended (using mm/dd/yy format).
![]() Consent Type - Click th drop-down arrow and select the type of consent given in association with this support services contact. Available selections are
Consent Type - Click th drop-down arrow and select the type of consent given in association with this support services contact. Available selections are
"Not Given," "Emergency/Crisis," and "Ongoing Care."
![]() NOTE: This option is only available after the contact information has been saved at least once.
NOTE: This option is only available after the contact information has been saved at least once.
![]() TIP: Consents information entered here is compiled into a consent form that can be accessed using the Medical module Consents Form feature.
TIP: Consents information entered here is compiled into a consent form that can be accessed using the Medical module Consents Form feature.
![]() Date Signed / Not Signed - If a consent type selection has been made, in this field, type or make changes to the date on which the consent was given or not given (using mm/dd/yy format).
Date Signed / Not Signed - If a consent type selection has been made, in this field, type or make changes to the date on which the consent was given or not given (using mm/dd/yy format).
![]() NOTE: This option is only available after the contact information has been saved at least once.
NOTE: This option is only available after the contact information has been saved at least once.
![]() Expiration Date - If a consent type selection has been made, and a date signed/not signed has been entered, type or make changes to the expiration date for the consent in the Expiration Date field (using mm/dd/yy format). If an expiration date is not entered and the contacts information is saved, the expiration date will automatically default to one year from the date signed/not signed.
Expiration Date - If a consent type selection has been made, and a date signed/not signed has been entered, type or make changes to the expiration date for the consent in the Expiration Date field (using mm/dd/yy format). If an expiration date is not entered and the contacts information is saved, the expiration date will automatically default to one year from the date signed/not signed.
![]() NOTE: This option is only available after the contact information has been saved at least once.
NOTE: This option is only available after the contact information has been saved at least once.
The process of updating support services contacts information is now complete.
![]() TIP: Support services contact information can also be maintained using the Medical module Support Services Contacts feature.
TIP: Support services contact information can also be maintained using the Medical module Support Services Contacts feature.
Return to the top of the page.
https://demodb.footholdtechnology.com/help/?10331
