|   |
| |
Below is an alphabetical list of the viewing options located on the Calendar page. To jump directly to the information for a specific option, press <Ctrl+F> to access your browser's search field and enter the name of the option in question.
![]() IMPORTANT! When the Calendar page is initially displayed, only the viewing options detailed here are shown on the page, and no appointments or events are shown. To view the Calendar data itself, adjust the Calendar settings (if needed - the same defaults will be pre-selected as always), and then click DISPLAY CALENDAR. If, while the Calendar is displayed, you change the settings on the viewing options used, click REFRESH CALENDAR to apply those changes. (Note that if the View or Scope settings are changed the Calendar display is temporarily removed from the page, at which point you must click DISPLAY CALENDAR to apply your settings and view appointment and event information again.)
IMPORTANT! When the Calendar page is initially displayed, only the viewing options detailed here are shown on the page, and no appointments or events are shown. To view the Calendar data itself, adjust the Calendar settings (if needed - the same defaults will be pre-selected as always), and then click DISPLAY CALENDAR. If, while the Calendar is displayed, you change the settings on the viewing options used, click REFRESH CALENDAR to apply those changes. (Note that if the View or Scope settings are changed the Calendar display is temporarily removed from the page, at which point you must click DISPLAY CALENDAR to apply your settings and view appointment and event information again.)
By default the Calendar displays two weeks' worth of dates beginning as the Start Date. To adjust the number of days included on the Calendar, and/or the timeframe it covers, two options are available to you, as detailed below. Please keep in mind that in most cases these two options work together, so we recommend configuring them in the following order.
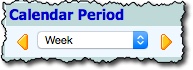
![]() To adjust the amount of time - Click the Calendar Period drop-down arrow and select the amount of time the Calendar is to include. Available options are based on the Calendar view being used, and may include a combination of: "Day," "Week," "Two Weeks," "Month," "Two Months," "Quarter," and "Recurring Cycle."
To adjust the amount of time - Click the Calendar Period drop-down arrow and select the amount of time the Calendar is to include. Available options are based on the Calendar view being used, and may include a combination of: "Day," "Week," "Two Weeks," "Month," "Two Months," "Quarter," and "Recurring Cycle."
![]() NOTE: When working with the Calendar Period, please keep in mind that if Show Hourly Schedule is selected under "Other Options," the calendar period selection list is limited to "Week" and "Two Weeks." Additionally, when using Availability view the "Month," "Two Months," and "Quarter" calendar period selections are replaced with a "Recurring Cycle" option that is only available in that view.
NOTE: When working with the Calendar Period, please keep in mind that if Show Hourly Schedule is selected under "Other Options," the calendar period selection list is limited to "Week" and "Two Weeks." Additionally, when using Availability view the "Month," "Two Months," and "Quarter" calendar period selections are replaced with a "Recurring Cycle" option that is only available in that view.
![]() To adjust the timeframe - If "Recurring Cycle" has been selected as the calendar period when using Availability view, adjust the Calendar's timeframe using the corresponding options displayed to the right of the drop-down, as shown below. Be sure to specify an End Date for the cycle as well.
To adjust the timeframe - If "Recurring Cycle" has been selected as the calendar period when using Availability view, adjust the Calendar's timeframe using the corresponding options displayed to the right of the drop-down, as shown below. Be sure to specify an End Date for the cycle as well.

![]() NOTE: The default value for recurring cycles is every 2 days; however, it can be set to any number of days, weeks, or months.
NOTE: The default value for recurring cycles is every 2 days; however, it can be set to any number of days, weeks, or months.
To adjust the timeframe when any other calendar period has been selected, click the arrow to the right or left of the calendar period drop-down to move the Calendar dates either forward or back in time, respectively.
Color Key
![]() NOTE: This option is not available when using Availability view.
NOTE: This option is not available when using Availability view.
By default each staff person who has appointments shown on the Calendar is listed in a separate color. This can be changed so that no colors are used, or so that the colors are applied to appointment/event types instead.
To adjust the Calendar's colorization, click the Color Key drop-down arrow and select one of the available options:
![]() Staff - When this option is selected, each staff person shown on the Calendar has his or her name listed in a separate color.
Staff - When this option is selected, each staff person shown on the Calendar has his or her name listed in a separate color.
![]() Event - When this option is selected, each type of appointment/event shown on the Calendar is displayed in a separate color.
Event - When this option is selected, each type of appointment/event shown on the Calendar is displayed in a separate color.
![]() Work Location - When this option is selected, appointments/events for each worksite location shown on the Calendar are displayed in a separate color.
Work Location - When this option is selected, appointments/events for each worksite location shown on the Calendar are displayed in a separate color.
![]() NOTE: This option is only available when Show Hourly Schedule is selected under "Other Options."
NOTE: This option is only available when Show Hourly Schedule is selected under "Other Options."
![]() None - When this option is selected, no colorization is used and all Calendar information is displayed in black.
None - When this option is selected, no colorization is used and all Calendar information is displayed in black.
Employee Groupings
![]() NOTE: This option is only available when using Availability view.
NOTE: This option is only available when using Availability view.
Employee Groupings is used in conjunction with the Scope and Selection options to narrow or expand the Calendar's content when using Availability view. Click here for more information.
![]() NOTE: This option is only available when using Availability view.
NOTE: This option is only available when using Availability view.
This field is only displayed in Availability view when the Calendar Period has been set to "Recurring Cycle." By default the end date is two weeks from the specified Start Date. To adjust the end date type the new value in the End Date field (using mm/dd/yyyy format), or select the date using the date picker icon to the right of the field.
![]() NOTE: These options are not available when using Availability view.
NOTE: These options are not available when using Availability view.
By default the Calendar displays several common appointment/event types based on the view you have chosen. Once you have made a view selection you can expand or narrow the list of included appointments/events by checking or un-checking one or more of the Included Events checkboxes, respectively. Appointment/event type selections and the views for which they are available are as follows:
|
evenT | view |
Staff |
Client |
Program |
Location |
|
Staff Meeting |
x |
|
x |
x |
|
Staff Training |
x |
|
x |
x |
|
Staff Personal |
x |
|
x |
|
|
Client Provider Appts |
x |
x |
x |
|
|
Client Program Appts |
x |
x |
x |
x |
|
Client Charting Event |
x |
x |
x |
|
|
Referral Interview |
x |
|
x |
x |
|
Client Group Activity |
x |
x |
x |
x |
|
Job Interview |
|
x |
x |
|
|
Entitlements End Dates * |
|
x |
x |
|
|
Consent End Dates * |
|
x |
x |
|
|
Lease Expiration Dates * |
|
|
x |
|
![]() NOTE: Events noted with an asterisk (*) above are always de-selected by default. All other appointment/event types are selected by default when available for your chosen view.
NOTE: Events noted with an asterisk (*) above are always de-selected by default. All other appointment/event types are selected by default when available for your chosen view.
![]() NOTE: Exceptions to the detail provided in this table are as follows:
NOTE: Exceptions to the detail provided in this table are as follows:
![]() If you do not have chart access, only "staff" appointments/events are available for selection.
If you do not have chart access, only "staff" appointments/events are available for selection.
![]() Referral Interviews pertain only to programs set up to use the multi-step intake form.
Referral Interviews pertain only to programs set up to use the multi-step intake form.
![]() When using Staff view, client provider appointments are only displayed on the Calendar when they have staff escorts assigned to them.
When using Staff view, client provider appointments are only displayed on the Calendar when they have staff escorts assigned to them.
![]() When using Program view with a scope of "All Clients," staff meetings, trainings, personal events, and referral interviews are not included in the Calendar display.
When using Program view with a scope of "All Clients," staff meetings, trainings, personal events, and referral interviews are not included in the Calendar display.
Legend
The legend is a read-only key to various letter or color codes displayed as part of the information shown in the Calendar grid. It be viewed automatically on printable versions of the Calendar, or by clicking the Legend plus sign above or below the Calendar display when in viewing mode.
![]()
The legend's content is based on the Calendar view you are using:
![]() When using Availability view -
When using Availability view -

![]() Green time blocks - Calendar time blocks are shaded green if the staff person is scheduled to work during that slot (as determined by his/her work schedule). Hovering your mouse over a green block displays the worksite set for that time in the employee's work schedule.
Green time blocks - Calendar time blocks are shaded green if the staff person is scheduled to work during that slot (as determined by his/her work schedule). Hovering your mouse over a green block displays the worksite set for that time in the employee's work schedule.
![]() Red time blocks - Calendar time blocks are shaded red if the staff person has an appointment/event scheduled during that slot. Hovering your mouse over that a red block displays basic details about the event, including event type, program, and times.
Red time blocks - Calendar time blocks are shaded red if the staff person has an appointment/event scheduled during that slot. Hovering your mouse over that a red block displays basic details about the event, including event type, program, and times.
![]() When using all other views -
When using all other views -

![]()
![]() - The appointment/event has been canceled. (For some event types where you can specify who did the cancelling - the client or staff - that information will be listed alongside the canceled icon. For other event types there is only a general canceled status.)
- The appointment/event has been canceled. (For some event types where you can specify who did the cancelling - the client or staff - that information will be listed alongside the canceled icon. For other event types there is only a general canceled status.)
![]() (K) - The appointment/event was kept.
(K) - The appointment/event was kept.
![]() (E) - The attendee was excused from the staff training.
(E) - The attendee was excused from the staff training.
![]() (A) - The attendee was added after the appointment/event was initially scheduled.
(A) - The attendee was added after the appointment/event was initially scheduled.
![]() (NS) - The attendee was a no show.
(NS) - The attendee was a no show.
![]() (T) - The staff member has been terminated, and the termination date precedes the appointment/event. (A strikethrough also appears through the staff member's name on the Calendar.)
(T) - The staff member has been terminated, and the termination date precedes the appointment/event. (A strikethrough also appears through the staff member's name on the Calendar.)
Other Options
Additional Calendar information can be added to/hidden from the page using the Other Options checkboxes that are part of the Calendar settings. A full list of these options is provided below in alphabetical order.
![]() NOTE: These options are not available when using Availability view.
NOTE: These options are not available when using Availability view.
Hide Staff Attendees / Show Attendees
By default, each appointment/event shown on the Calendar is displayed with the name of the staff person or persons for whom it is scheduled. To adjust the Calendar display so that staff names do not appear, click the Hide Staff Attendees checkbox.
Show Appointment Summary
To include beneath the Calendar (in both display and printable versions) a summary table that counts the number of events of each type for clients and staff or locations, click the Show Appointment Summary checkbox. When the Calendar is displayed/refreshed, the summary table is then displayed with its content set based on the following rules:
![]() Columns - Each event type for which a scheduled appointment/event is shown on the Calendar is represented by one or more columns in the summary table. Event types with multiple columns are those for which appointment status information is kept (for example referral interviews, medical appointments, program appointments, and group activities). In such cases there are separate "Scheduled," "Kept," "Canceled," and "No Show" columns.
Columns - Each event type for which a scheduled appointment/event is shown on the Calendar is represented by one or more columns in the summary table. Event types with multiple columns are those for which appointment status information is kept (for example referral interviews, medical appointments, program appointments, and group activities). In such cases there are separate "Scheduled," "Kept," "Canceled," and "No Show" columns.
![]() Rows - When using the Staff, Program, or Client views, there is a row in the summary table for each staff person and client for whom a scheduled appointment/event is shown on the Calendar. When using the Location view, there are additional rows for each location. Beneath each group of rows (staff, client, and location when applicable) there is also totals information.
Rows - When using the Staff, Program, or Client views, there is a row in the summary table for each staff person and client for whom a scheduled appointment/event is shown on the Calendar. When using the Location view, there are additional rows for each location. Beneath each group of rows (staff, client, and location when applicable) there is also totals information.
To export the summary information to Microsoft Excel for further review and analysis, click the Excel File link above the table. A PHI Download Alert is displayed, reminding you of your obligation to properly handle any confidential data and/or protected health information (PHI) within the download in accordance with related government regulations and agency policies. After reading the alert, click OK to acknowledge it and proceed with the export, or Cancel to return to the previous page.
This option, which is checked by default when "Show Hourly Schedule" has been selected, results in a view of the Calendar that has hourly timeslots. To adjust the Calendar display so that each hour is broken up into timeslots of five minutes, uncheck the Show Condensed View checkbox.
![]() NOTE: This option is only available when Show Hourly Schedule is selected under "Other Options."
NOTE: This option is only available when Show Hourly Schedule is selected under "Other Options."
By default, each appointment/event shown on the Calendar is displayed in a single box for the day on which it is scheduled. To adjust the Calendar display so that it instead appears as a grid of horizontal timeslots corresponding to hours in a day where open and busy hours are clearly shown, click the Show Hourly Schedule checkbox.
![]() NOTE: This option is only available when using Staff view with a single staff member selected.
NOTE: This option is only available when using Staff view with a single staff member selected.
When working with the hourly schedule, keep in mind that:
![]() The Calendar Period selections are limited to one and two weeks.
The Calendar Period selections are limited to one and two weeks.
![]() The Show Location and Show Condensed View options are selected by default and can be un-checked as needed.
The Show Location and Show Condensed View options are selected by default and can be un-checked as needed.
![]() All appointments/events that have designated start times are displayed in the corresponding hourly timeslots. If two appointments/events overlap, they will be displayed one after the other in the appropriate slot.
All appointments/events that have designated start times are displayed in the corresponding hourly timeslots. If two appointments/events overlap, they will be displayed one after the other in the appropriate slot.
![]() Appointments/events that are not time-specific (such as chart events, entitlement end dates, consent end dates, and lease expiration dates) are displayed on the date of their occurrence, but at the top of the day in a row labeled "Day Events" above the first hourly timeslot.
Appointments/events that are not time-specific (such as chart events, entitlement end dates, consent end dates, and lease expiration dates) are displayed on the date of their occurrence, but at the top of the day in a row labeled "Day Events" above the first hourly timeslot.
![]() The default timeslots range from 8am to 6pm; however, if there are any appointments already scheduled outside of that timeframe, or if a work schedule falls outside of that timeframe, the display is adjusted to include the times of the appointments/events/work schedule in question.
The default timeslots range from 8am to 6pm; however, if there are any appointments already scheduled outside of that timeframe, or if a work schedule falls outside of that timeframe, the display is adjusted to include the times of the appointments/events/work schedule in question.
![]() Double-clicking in a timeslot enables you to schedule an appointment/event in that slot. If it's necessary to schedule an appointment/event in a slot outside of the default timeframe of 8am to 6pm, double-click in any timeslot and change the time on the scheduling page accordingly.
Double-clicking in a timeslot enables you to schedule an appointment/event in that slot. If it's necessary to schedule an appointment/event in a slot outside of the default timeframe of 8am to 6pm, double-click in any timeslot and change the time on the scheduling page accordingly.
![]() If a staff member has a work schedule set, his/her work schedule hours have a color-coded bar next to them in the Calendar with each worksite displaying in a separate color. When you hover your mouse pointer over a day with a work schedule, a mouseover will display providing details on location and start and end times.
If a staff member has a work schedule set, his/her work schedule hours have a color-coded bar next to them in the Calendar with each worksite displaying in a separate color. When you hover your mouse pointer over a day with a work schedule, a mouseover will display providing details on location and start and end times.
By default, each appointment/event shown on the Calendar is only displayed with location information when using Location view. To adjust the Calendar display so that location information appears when using other views, click the Show Location checkbox. When the Calendar is displayed/refreshed all appointments/events are then displayed with "At:" followed by their respective locations.
![]() NOTE: This option is not available when using Location view. When using Staff view it is selected by default if the Show Hourly Schedule option has been selected.
NOTE: This option is not available when using Location view. When using Staff view it is selected by default if the Show Hourly Schedule option has been selected.
Show Progress Note Summary
To include beneath the Calendar (in both display and printable versions) a summary table that lists each program appointment shown on the calendar that has been marked as "Kept," along with information on whether each has been documented with a corresponding progress note, click the Show Progress Note Summary checkbox.
![]() NOTE: This option is not available unless program appointments have been chosen as an included event.
NOTE: This option is not available unless program appointments have been chosen as an included event.
Within the progress note summary table the "Documentation" column will display "yes" or "no" to indicate whether documentation has been entered for each program appointment listed. "Yes" will only be shown when a progress note has been entered by the listed staff person for the exact program, client, date, and time of the program appointment; otherwise, it will display "no."
![]() TIP: To sort the progress note summary table by one of the included data variables, click the corresponding column heading. Clicking the heading a second time will reverse the sort order.
TIP: To sort the progress note summary table by one of the included data variables, click the corresponding column heading. Clicking the heading a second time will reverse the sort order.
![]() TIP: To export the summary information to Microsoft Excel for further review and analysis, click the Excel File link above the table. A PHI Download Alert is displayed, reminding you of your obligation to properly handle any confidential data and/or protected health information (PHI) within the download in accordance with related government regulations and agency policies. After reading the alert, click OK to acknowledge it and proceed with the export, or Cancel to return to the previous page.
TIP: To export the summary information to Microsoft Excel for further review and analysis, click the Excel File link above the table. A PHI Download Alert is displayed, reminding you of your obligation to properly handle any confidential data and/or protected health information (PHI) within the download in accordance with related government regulations and agency policies. After reading the alert, click OK to acknowledge it and proceed with the export, or Cancel to return to the previous page.
Printable Calendar
![]() NOTE: This option is not available when using Availability view.
NOTE: This option is not available when using Availability view.
This feature is used to view a printable version of the Calendar page that excludes all viewing fields and options. For more information, see Printing the Calendar.
The Scope and Selection options are used in conjunction with the selected View to further narrow what you see on the Calendar. Once a view has been chosen, the page automatically refreshes to match the Scope and Selection options to that view. A Scope is then chosen, again refreshing the page to match the Selection list contents to your choice. It is from that Selection list which you will ultimately make the final determination which staff member(s), client(s), program(s), or location(s) will be shown on the Calendar.
![]() TIP: As detailed above, Scope and Selection are dynamic options, meaning that the contents of their drop-down selection lists are updated based on prior selections on the page. For this reason, you should always make selections in the following order: View, Scope, Employee Groupings (Availability view only), and then Selection. In addition, in some cases if you make a selection out of order (for example, Selection and then Employee Grouping if you are using Availability view) you will lose your previous selections.
TIP: As detailed above, Scope and Selection are dynamic options, meaning that the contents of their drop-down selection lists are updated based on prior selections on the page. For this reason, you should always make selections in the following order: View, Scope, Employee Groupings (Availability view only), and then Selection. In addition, in some cases if you make a selection out of order (for example, Selection and then Employee Grouping if you are using Availability view) you will lose your previous selections.
The Scope / Selections you see - based on your choice of view - and the ways in which they should be configured to adjust your Calendar contents, are each explained here.
Sort Order
![]() NOTE: This option is not available when using Availability view. Additionally, it is only available to users with chart access. If you do not have chart access, all appointments/events are automatically sorted by appointment time then staff name.
NOTE: This option is not available when using Availability view. Additionally, it is only available to users with chart access. If you do not have chart access, all appointments/events are automatically sorted by appointment time then staff name.
By default any appointments/events displayed on the Calendar for a given day are sorted by appointment time (with the earliest appointments listed first), and then alphabetically by staff name if there is more than one appointment at a specific time.To change the order in which appointments are displayed on the Calendar, click the Sort Order drop-down arrow and select one of the following options:
![]() Sort by Appt Time, then Staff
Sort by Appt Time, then Staff
![]() Sort by Appt Type, Appt Time, Staff, Client
Sort by Appt Type, Appt Time, Staff, Client
![]() Sort by Client, Appt Time, Staff, Appt Type
Sort by Client, Appt Time, Staff, Appt Type
![]() Sort by Appt Time, Staff, Client, Appt Type
Sort by Appt Time, Staff, Client, Appt Type
![]() Sort by Staff, Appt Time, Client, Appt Type
Sort by Staff, Appt Time, Client, Appt Type
![]() NOTE: This list is limited when using the Show Hourly Schedule option.
NOTE: This list is limited when using the Show Hourly Schedule option.
By default, when using Availability view the first date the Calendar display includes is today. For all other views the first date the Calendar display includes is Sunday of the current week. To adjust that start date so that the Calendar includes dates beginning with one of your choosing, type the start date in the Start Date field (using mm/dd/yyyy format), or select a date using the date picker to the right of the field.
![]() NOTE: This option is only available when using Availability view.
NOTE: This option is only available when using Availability view.
When the Calendar's Time Period has been set to "Time Range," specify the range of times to be worked with in the Start Time and End Time fields. To do so, for one or both fields select the existing value and overwrite it with the new time (using HH:MM AM/PM format). Please note that if the times specified do not coincide with the 15 minute intervals used by Availability view, they will be rounded up or down as appropriate; for example, a start time of 9:25 am would be rounded back to 9:15am, and an end time of 10:25am would be rounded forward to 10:30am.
![]() NOTE: If a Time Period other than "Time Range" has been selected, the values in these fields are read-only.
NOTE: If a Time Period other than "Time Range" has been selected, the values in these fields are read-only.
![]() NOTE: This option is only available when using Availability view.
NOTE: This option is only available when using Availability view.
When using Availability view, the Calendar displays each date as 15 minute blocks of time stretching, by default, from 8:00am to 6:00pm. To adjust this default timeframe so that you can focus on a smaller window of time for each date shown, click the Time Period drop-down arrow and select one of the following options:
![]() Work Day - The default selection. When selected, the Calendar displays a period of time from 8:00am to 6:00pm each day.
Work Day - The default selection. When selected, the Calendar displays a period of time from 8:00am to 6:00pm each day.
![]() Morning - When selected, the Calendar displays a period of time from 8:00am to 12:00pm each day.
Morning - When selected, the Calendar displays a period of time from 8:00am to 12:00pm each day.
![]() Afternoon - When selected, the Calendar displays a period of time from 12:00pm to 6:00pm each day.
Afternoon - When selected, the Calendar displays a period of time from 12:00pm to 6:00pm each day.
![]() Evening - When selected, the Calendar displays a period of time from 6:00pm to 9:00pm each day.
Evening - When selected, the Calendar displays a period of time from 6:00pm to 9:00pm each day.
![]() Time Range - When selected, the period of time displayed by the Calendar is based on a customized Start Time and End Time you specify.
Time Range - When selected, the period of time displayed by the Calendar is based on a customized Start Time and End Time you specify.
The View option is used to adjust which appointments/events are shown on the Calendar, and is the first thing you should specify when working with the Calendar's viewing options. To change which view is currently being used, click the View drop-down arrow and select one of the following:
![]() TIP: The "Client" and "Program" views detailed here are only available to users with chart access. If you do not have chart access, you can only select "Staff," "Location," or "Availability."
TIP: The "Client" and "Program" views detailed here are only available to users with chart access. If you do not have chart access, you can only select "Staff," "Location," or "Availability."
![]() Staff - When selected, the Calendar only includes those appointments/events scheduled for a specific staff member of your choosing, or for a selected group of staff members.
Staff - When selected, the Calendar only includes those appointments/events scheduled for a specific staff member of your choosing, or for a selected group of staff members.
![]() Client - When selected, the Calendar only includes appointments/events for a specific client of your choosing, or for a selected group of clients.
Client - When selected, the Calendar only includes appointments/events for a specific client of your choosing, or for a selected group of clients.
![]() NOTE: Each agency refers to its clients in a different way, and the terminology in AWARDS can be adjusted accordingly. As a result, the "Client" view detailed here may instead be labeled "Consumer," "Member," or something similar. Regardless of the label, the use of this view is the same.
NOTE: Each agency refers to its clients in a different way, and the terminology in AWARDS can be adjusted accordingly. As a result, the "Client" view detailed here may instead be labeled "Consumer," "Member," or something similar. Regardless of the label, the use of this view is the same.
![]() Program - When selected, the Calendar includes appointments/events for a selected program or group of programs.
Program - When selected, the Calendar includes appointments/events for a selected program or group of programs.
![]() Location - When selected, the Calendar includes only those appointments/events scheduled to take place at a selected location.
Location - When selected, the Calendar includes only those appointments/events scheduled to take place at a selected location.
![]() Availability - When selected, the Calendar enables you to see blocks of time within a customizable timeframe when specific staff are free or busy based on work schedules (when entered) and scheduled appointments and events.
Availability - When selected, the Calendar enables you to see blocks of time within a customizable timeframe when specific staff are free or busy based on work schedules (when entered) and scheduled appointments and events.
Once you've made a view selection, the page is automatically refreshed to update several of the other viewing options and the Calendar display based on your choice. You can then proceed with making any other adjustments needed to the Calendar's settings.
https://demodb.footholdtechnology.com/help/?10164

 When using Availability view