|   |
| |
To schedule a provider appointment for a client, complete the following steps from the Schedule Calendar Event page displayed after clicking a date on the Calendar:
![]() TIP: In order to schedule provider appointments, you must have the following permissions:
TIP: In order to schedule provider appointments, you must have the following permissions:
Display Any Chart Records Buttons
AND
Display Chart Records Medical Button
-or-
Display Chart Records Profile Button
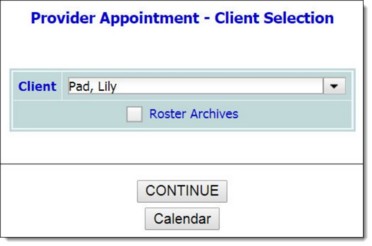
![]() TIP: If the client to be worked with is a former (discharged) client, first click the Roster Archives checkbox.
TIP: If the client to be worked with is a former (discharged) client, first click the Roster Archives checkbox.
![]() NOTE: The Date field on this page is pre-populated with the date selected on the Calendar.
NOTE: The Date field on this page is pre-populated with the date selected on the Calendar.
![]() Provider - Click the drop-down arrow and select the provider with which the appointment is scheduled. If the necessary provider is not available, select "Other." When "Other" is selected, the Add New Provider pop-up is displayed for users to enter the provider's information, including Provider Name, Profession, Agency, Address, and Office Phone. When data entry is complete, click Save on the pop-up to save the information and return to the appointment form in data entry mode.
Provider - Click the drop-down arrow and select the provider with which the appointment is scheduled. If the necessary provider is not available, select "Other." When "Other" is selected, the Add New Provider pop-up is displayed for users to enter the provider's information, including Provider Name, Profession, Agency, Address, and Office Phone. When data entry is complete, click Save on the pop-up to save the information and return to the appointment form in data entry mode.
![]() NOTE: The providers available for selection in this list are those currently included in the Support Service Contacts portion of the client's face sheet, which can also be accessed using the Medical module Providers feature. (When a provider is added to the appointment through the Add new Provider pop-up, that provider is also added to the providers list accessed in those locations.)
NOTE: The providers available for selection in this list are those currently included in the Support Service Contacts portion of the client's face sheet, which can also be accessed using the Medical module Providers feature. (When a provider is added to the appointment through the Add new Provider pop-up, that provider is also added to the providers list accessed in those locations.)
![]() Date - If needed, make changes to the date of the appointment (using mm/dd/yyyy format), or select a date using available date picker.
Date - If needed, make changes to the date of the appointment (using mm/dd/yyyy format), or select a date using available date picker.
![]() Time - In this field enter the appointment time (using HH:MM AM/PM format).
Time - In this field enter the appointment time (using HH:MM AM/PM format).
![]() Staff Escort - If a staff person will be escorting the client to his or her appointment, click this drop-down arrow and select that staff person.
Staff Escort - If a staff person will be escorting the client to his or her appointment, click this drop-down arrow and select that staff person.
![]() NOTE: Staff members available for selection in this list are those with chart access permission for the program.
NOTE: Staff members available for selection in this list are those with chart access permission for the program.
![]() Reason for Consultation - In this text box, enter information on the reason for the client's appointment.
Reason for Consultation - In this text box, enter information on the reason for the client's appointment.
![]() Travel Time To / From Appointment - If a staff escort was selected for the appointment, his or her travel time can be indicated using these fields. In each of these fields, enter the required travel time for the escort to and from the appointment (using HH:MM format). If a value is entered in one or both of these fields, that travel time is taken into account when determining availability in the Calendar's "Availability" view. It will also be factored in when displaying appointments in "Staff" view; for example, if a 9am to 10am providerappointment is recorded with 15 minutes of travel time to and from, that appointment will display on the staff escort's calendar as occupying the time between 8:45am and 10:15am.
Travel Time To / From Appointment - If a staff escort was selected for the appointment, his or her travel time can be indicated using these fields. In each of these fields, enter the required travel time for the escort to and from the appointment (using HH:MM format). If a value is entered in one or both of these fields, that travel time is taken into account when determining availability in the Calendar's "Availability" view. It will also be factored in when displaying appointments in "Staff" view; for example, if a 9am to 10am providerappointment is recorded with 15 minutes of travel time to and from, that appointment will display on the staff escort's calendar as occupying the time between 8:45am and 10:15am.
![]() TIP: Travel time can only be specified if a staff escort has been set for the appointment.
TIP: Travel time can only be specified if a staff escort has been set for the appointment.
![]() Include Form - If a FormBuilder form should be included in the appointment record, click this drop-down arrow and select that form. Upon selection, the form content is displayed on the page. Complete data entry in that portion of the page as necessary.
Include Form - If a FormBuilder form should be included in the appointment record, click this drop-down arrow and select that form. Upon selection, the form content is displayed on the page. Complete data entry in that portion of the page as necessary.
![]() NOTE: This selection only displays when forms created using the FormBuilder have been set to display in provider appointment forms for the selected program.
NOTE: This selection only displays when forms created using the FormBuilder have been set to display in provider appointment forms for the selected program.
![]() TIP: In some cases you may need to adjust your current Calendar settings before your new appointment/event will be included in the Calendar display.
TIP: In some cases you may need to adjust your current Calendar settings before your new appointment/event will be included in the Calendar display.
The process of scheduling a provider appointment is now complete.
https://demodb.footholdtechnology.com/help/?10158
