|   |
| |
Using the PAS Reports components of the OASAS Reports feature, users can generate and view the following PAS reports for individual clients:
![]() Admissions - PAS 44
Admissions - PAS 44
![]() Discharges - PAS 45
Discharges - PAS 45
![]() Transfers In - PAS 47
Transfers In - PAS 47
![]() Transfers Out - PAS 47
Transfers Out - PAS 47
![]() Element Transition - PAS 125
Element Transition - PAS 125
![]() TIP: The PAS 47 reports are applicable only to those programs set up to use the optional OASAS Client Transfers feature in AWARDS. For more information on that feature, please refer to the OASAS Client Transfers - Instruction Sheet.
TIP: The PAS 47 reports are applicable only to those programs set up to use the optional OASAS Client Transfers feature in AWARDS. For more information on that feature, please refer to the OASAS Client Transfers - Instruction Sheet.
![]() TIP: The PAS 125 report displays transitions made between elements of care within an 820 program stay using the optional Services - Individual module's Program Status feature. If this feature is not currently turned on in your AWARDS database and you would like it to be, please contact the Foothold Help Desk.
TIP: The PAS 125 report displays transitions made between elements of care within an 820 program stay using the optional Services - Individual module's Program Status feature. If this feature is not currently turned on in your AWARDS database and you would like it to be, please contact the Foothold Help Desk.
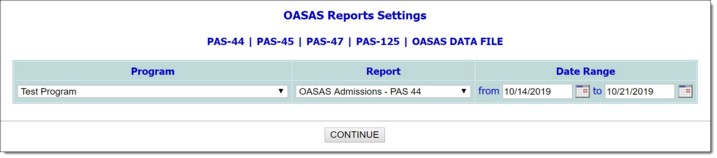
To view any of the PAS reports, complete the following steps:
![]() TIP: The following instructions detail accessing OASAS Reports from directly within the OASAS Menu feature in the Fiscal module. This report is also available in the AWARDS Reports module, where it can be bookmarked for easy access. For more information on using the Reports module, click here.
TIP: The following instructions detail accessing OASAS Reports from directly within the OASAS Menu feature in the Fiscal module. This report is also available in the AWARDS Reports module, where it can be bookmarked for easy access. For more information on using the Reports module, click here.
![]() IMPORTANT! In order for an OASAS program to be included in the Data File, that program must have a PRU Number specified for it in the System Setup module, Agency Program Information, Add/Edit Entire Program feature.
IMPORTANT! In order for an OASAS program to be included in the Data File, that program must have a PRU Number specified for it in the System Setup module, Agency Program Information, Add/Edit Entire Program feature.
![]() NOTE: Upon clicking any of the available links, a PHI Download Alert is displayed, reminding you of your obligation to properly handle any confidential data and/or protected health information (PHI) within the download in accordance with related government regulations and agency policies. After reading the alert, click OK to acknowledge it and proceed with the download, or Cancel to return to the previous page.
NOTE: Upon clicking any of the available links, a PHI Download Alert is displayed, reminding you of your obligation to properly handle any confidential data and/or protected health information (PHI) within the download in accordance with related government regulations and agency policies. After reading the alert, click OK to acknowledge it and proceed with the download, or Cancel to return to the previous page.
The process of viewing a PAS report is now complete.
https://demodb.footholdtechnology.com/help/?11142
