|   |
| |
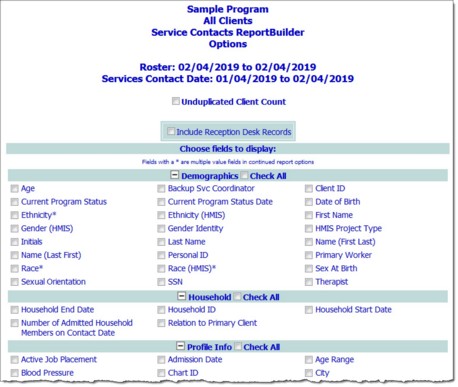
The AWARDS Service Contacts ReportBuilder, located in the Reports module, is a powerful tool that can be used to generate user-customized reports of basic client demographics along with detailed services information for services collected using group notes, group activity attendance records, progress notes, reception desk program attendance, and the contacts log (basic or supportive services checklist versions). To generate and save a Service Contacts ReportBuilder report that can be re-run in the future, to generate a single-use report, or to use and/or update an existing report format to generate a report, complete the following steps:
![]() TIP: For frequently asked questions about the Service Contacts ReportBuilder, skip down to the bottom of the page.
TIP: For frequently asked questions about the Service Contacts ReportBuilder, skip down to the bottom of the page.


![]() In Program - When this option is selected the report will only include clients with program history records indicating they were enrolled in the program at some point during the specified date range. This selection is recommended if you will be narrowing the report contents using multiple date range filters (set in step 19).
In Program - When this option is selected the report will only include clients with program history records indicating they were enrolled in the program at some point during the specified date range. This selection is recommended if you will be narrowing the report contents using multiple date range filters (set in step 19).
![]() NOTE: In this context, clients who were enrolled in the program include those who entered the program on or before the report "To" date, those who were discharged from the program on or after the report "From" date, and those who were enrolled in the program for the entirety of the report period.
NOTE: In this context, clients who were enrolled in the program include those who entered the program on or before the report "To" date, those who were discharged from the program on or after the report "From" date, and those who were enrolled in the program for the entirety of the report period.
![]() In Program Including Pending Clients - When this option is selected the report will include admitted and pending clients - those with an admission date OR intake date, respectively, prior to the report end date, and no discharge date (or no discharge date within the date range).
In Program Including Pending Clients - When this option is selected the report will include admitted and pending clients - those with an admission date OR intake date, respectively, prior to the report end date, and no discharge date (or no discharge date within the date range).
![]() NOTE: Pending clients are clients in a multi-step intake program who have had an intake processed but who are not yet fully admitted - or clients for whom a room reservation has been made. Programs using Drop In functionality also create clients designated as pending.
NOTE: Pending clients are clients in a multi-step intake program who have had an intake processed but who are not yet fully admitted - or clients for whom a room reservation has been made. Programs using Drop In functionality also create clients designated as pending.
![]() Admitted - When this option is selected the report will only include clients with program history records indicating they were admitted to the program at some point during the specified date range.
Admitted - When this option is selected the report will only include clients with program history records indicating they were admitted to the program at some point during the specified date range.
![]() Admitted or Transferred In - This option is available in databases that are set up to use the Transfers module. When this option is selected the report includes clients with program history records indicating they were either admitted to the program (via the Intake/Admission module) or transferred into the program (via the Transfers module) at some point during the specified date range.
Admitted or Transferred In - This option is available in databases that are set up to use the Transfers module. When this option is selected the report includes clients with program history records indicating they were either admitted to the program (via the Intake/Admission module) or transferred into the program (via the Transfers module) at some point during the specified date range.
![]() Discharged - When this option is selected the report will only include clients with program history records indicating they were discharged from the program at some point during the specified date range. Current program episodes will not be included.
Discharged - When this option is selected the report will only include clients with program history records indicating they were discharged from the program at some point during the specified date range. Current program episodes will not be included.
![]() Discharged or Transferred Out - This option is available in databases that are set up to use the Transfers module. When selected the report includes clients with program history records indicating they were either discharged from the program (via the Discharge module) or transferred out of the program (via the Transfers module) at some point during the specified date range.
Discharged or Transferred Out - This option is available in databases that are set up to use the Transfers module. When selected the report includes clients with program history records indicating they were either discharged from the program (via the Discharge module) or transferred out of the program (via the Transfers module) at some point during the specified date range.
![]() NOTE: In the event that you are creating a new report format that will be saved, please be aware that the selection you make here is not saved with the report. It, along with the settings specified in steps 7, 9, and 10 must be set each time the report is run.
NOTE: In the event that you are creating a new report format that will be saved, please be aware that the selection you make here is not saved with the report. It, along with the settings specified in steps 7, 9, and 10 must be set each time the report is run.
![]() Clients with Records - The default. As noted above, includes in the report all clients with records matching the report settings, and excludes those that do not match.
Clients with Records - The default. As noted above, includes in the report all clients with records matching the report settings, and excludes those that do not match.
![]() All Clients - Includes in the report all clients on the program roster, whether or not they have records that match the report settings. Those without matches will display "--" for data variables in the report where there is not a matching record.
All Clients - Includes in the report all clients on the program roster, whether or not they have records that match the report settings. Those without matches will display "--" for data variables in the report where there is not a matching record.
![]() Select Client - Limits report contents to those records for a single client only, if records are found for that client that match the report settings. When selected, use the corresponding drop-down (automatically displayed when "Select Client" is clicked) to choose the client for whom the report is to be generated. (The selection list is limited to those clients matching the roster date range settings selected in previous steps.)
Select Client - Limits report contents to those records for a single client only, if records are found for that client that match the report settings. When selected, use the corresponding drop-down (automatically displayed when "Select Client" is clicked) to choose the client for whom the report is to be generated. (The selection list is limited to those clients matching the roster date range settings selected in previous steps.)
![]() Contact Date - When selected, the report is limited to records for which the contact date is within the specified date range.
Contact Date - When selected, the report is limited to records for which the contact date is within the specified date range.
![]() Date Modified - When selected, the report is limited to records for which the date modified is within the specified date range.
Date Modified - When selected, the report is limited to records for which the date modified is within the specified date range.
![]() Date Written - When selected, the report is limited to records for which the date written is within the specified date range.
Date Written - When selected, the report is limited to records for which the date written is within the specified date range.
The default selection is "Contact Date."
![]() NOTE: This selection can be particularly useful to agencies that generate service contacts reports repeatedly over time, enabling them to pull records incrementally without having to generate a full report/export that includes records that been been untouched since the last report/export.
NOTE: This selection can be particularly useful to agencies that generate service contacts reports repeatedly over time, enabling them to pull records incrementally without having to generate a full report/export that includes records that been been untouched since the last report/export.
![]() NOTE: This option is used to provide access to an ExportBuilder corresponding to the ReportBuilder with which you are working. AWARDS ExportBuilders - which are designed for use by individuals who are familiar with export files and formats, their design, and setup - harness the power of ReportBuilder functionality and take it a step further to meet a variety of outside reporting needs. With ExportBuilders, users can create customized data reports as they would with the ReportBuilder itself, and from those reports generate export files of a number of different types - CSV, TXT, XLS, or XML. Exported files can be saved to your computer, then uploaded into other data collection systems and/or worked with in other applications as needed. Additionally, as can be done with ReportBuilders, ExportBuilder formats can be saved and shared for future use.
NOTE: This option is used to provide access to an ExportBuilder corresponding to the ReportBuilder with which you are working. AWARDS ExportBuilders - which are designed for use by individuals who are familiar with export files and formats, their design, and setup - harness the power of ReportBuilder functionality and take it a step further to meet a variety of outside reporting needs. With ExportBuilders, users can create customized data reports as they would with the ReportBuilder itself, and from those reports generate export files of a number of different types - CSV, TXT, XLS, or XML. Exported files can be saved to your computer, then uploaded into other data collection systems and/or worked with in other applications as needed. Additionally, as can be done with ReportBuilders, ExportBuilder formats can be saved and shared for future use.
The instructions provided here detail use of the Service Contacts ReportBuilder only, not the corresponding ExportBuilder. For more information on using ExportBuilders, click here.
![]() NOTE: When using this option the report will remain in your messages for one month, after which time it will be deleted. (The exact date of deletion will be displayed in red at the top of the report message for your reference.) If you know you will need the report content after that time, be sure to download the Excel file (Excel File.zip) or HTML content (Report Content.html) attached to the report message. If you don't download one of these attachments before the message is deleted, you will need to manually re-generate the report if you need access to it in the future.
NOTE: When using this option the report will remain in your messages for one month, after which time it will be deleted. (The exact date of deletion will be displayed in red at the top of the report message for your reference.) If you know you will need the report content after that time, be sure to download the Excel file (Excel File.zip) or HTML content (Report Content.html) attached to the report message. If you don't download one of these attachments before the message is deleted, you will need to manually re-generate the report if you need access to it in the future.
![]() Use a previously saved report format - To generate the report using a previously created and saved format, select that format from this drop-down. When using this method, you can immediately generate the report without changing any settings. Alternately, you can first review and modify the settings of the format by checking off the available Provide option to modify settings of saved report format checkbox.
Use a previously saved report format - To generate the report using a previously created and saved format, select that format from this drop-down. When using this method, you can immediately generate the report without changing any settings. Alternately, you can first review and modify the settings of the format by checking off the available Provide option to modify settings of saved report format checkbox.
![]() Start from scratch, without using a previously saved report format - To create your own report format for single-time use or for saving and later re-use, leave the saved report format drop-down blank.
Start from scratch, without using a previously saved report format - To create your own report format for single-time use or for saving and later re-use, leave the saved report format drop-down blank.
![]() NOTE: If you (or another user) have previously saved a default report format for this ReportBuilder and program, that format is pre-selected here. Make changes to the selection as needed, or leave it at its default value.
NOTE: If you (or another user) have previously saved a default report format for this ReportBuilder and program, that format is pre-selected here. Make changes to the selection as needed, or leave it at its default value.
If you are using an existing report format and have NOT chosen to view/modify the settings of that format, you are now taken directly to the report page. Continue with step 24.
![]() NOTE: If you chose to send the report to yourself via the Messages module (in step 12), a notice is first displayed on the page to let you know that report generation is in process and that the report will be sent to your Messages module upon completion. You can then navigate away from the page, or wait for the report to complete and then proceed with step 24. If you did NOT set that option, you can do so now by clicking Send to AWARDS Messages.
NOTE: If you chose to send the report to yourself via the Messages module (in step 12), a notice is first displayed on the page to let you know that report generation is in process and that the report will be sent to your Messages module upon completion. You can then navigate away from the page, or wait for the report to complete and then proceed with step 24. If you did NOT set that option, you can do so now by clicking Send to AWARDS Messages.
In all other instances, the Options page is displayed. Continue with step 15.
![]() NOTE: When this option is selected, the report contents are limited to the most recent service contact record for each included client.
NOTE: When this option is selected, the report contents are limited to the most recent service contact record for each included client.
|
Intake Form |
Face Sheet |
|
Contacts Log |
Supportive Services Checklist |
|
Progress Notes |
Group Notes |
Some variables which are not necessarily found on the above forms are also available; for example, "Age" and "Client ID."
![]() NOTE: A section for "Date Parts" - common to all ReportBuilders that have date variables available for selection - is also included on this page. It is intended to allow for greater flexibility of reporting around dates; for example, giving you the option to report out on a month as either a number (1) or a written month (January).
NOTE: A section for "Date Parts" - common to all ReportBuilders that have date variables available for selection - is also included on this page. It is intended to allow for greater flexibility of reporting around dates; for example, giving you the option to report out on a month as either a number (1) or a written month (January).
Click the checkbox next to each variable to be included in the report, and/or use the available Check All options as needed.
![]() TIP: Individual detail report options and/or summary table selections must be set before the report can be generated. For more information on using the various report options, please click here.
TIP: Individual detail report options and/or summary table selections must be set before the report can be generated. For more information on using the various report options, please click here.
![]() TIP: If it is not necessary to save the report format and you wish only to view the report contents, please skip to step 23.
TIP: If it is not necessary to save the report format and you wish only to view the report contents, please skip to step 23.
![]() TIP: For more information on using the save report format options, please click here.
TIP: For more information on using the save report format options, please click here.
![]() NOTE: If you chose to send the report to yourself via the Messages module (in step 12), a notice is displayed on the page to let you know that report generation is in process and that the report will be sent to your Messages module upon completion. You can then navigate away from the page, or wait for the report to complete, and then proceed with step 24. If you did NOT set that option, you can do so now by clicking Send to AWARDS Messages.
NOTE: If you chose to send the report to yourself via the Messages module (in step 12), a notice is displayed on the page to let you know that report generation is in process and that the report will be sent to your Messages module upon completion. You can then navigate away from the page, or wait for the report to complete, and then proceed with step 24. If you did NOT set that option, you can do so now by clicking Send to AWARDS Messages.
![]() NOTE: When working with report data, please keep in mind that:
NOTE: When working with report data, please keep in mind that:
![]() If the Unduplicated Count option was selected in step 15, only the most recent service contact record for each of the included clients is displayed.
If the Unduplicated Count option was selected in step 15, only the most recent service contact record for each of the included clients is displayed.
![]() When a report is long enough to require you to scroll down the page to view all of its content, the header row of the data table (individual detail and/or summary) "freezes" at the top of the page. Similarly, when printing a report that covers more than one page, the header row of any tables split between pages is shown at the top of each page.
When a report is long enough to require you to scroll down the page to view all of its content, the header row of the data table (individual detail and/or summary) "freezes" at the top of the page. Similarly, when printing a report that covers more than one page, the header row of any tables split between pages is shown at the top of each page.
The process of generating a Service Contacts ReportBuilder report is now complete.
Service Contacts ReportBuilder Frequently Asked Questions
The following frequently asked questions provide details on the most commonly asked about pieces of the Service Contacts ReportBuilder feature. Click a question from the list here to navigate directly to the corresponding answer, or scroll through the full list of questions and answers below.
How can I tell which services have been billed/not billed?
How do I build a service contacts report that excludes amended progress note entries?
Is there a way to see which service contacts have been electronically signed?
What do the letters in a "Record ID" mean in services-related ReportBuilders?
Who displays as the group leader on ReportBuilders containing data from scheduled group activities?
Why isn't a note written on a certain date appearing in my ReportBuilder report for that date?
How can I tell which services have been billed/not billed?
A data variable called Invoice ID (Batch ID) is available in the following Services module ReportBuilders for all agencies that use the BillingBuilder:
- Contacts Log ReportBuilder
- Group Notes ReportBuilder
- Progress Notes ReportBuilder
- Service Contacts ReportBuilder
When the Invoice ID (Batch ID) variable is included in one of these ReportBuilders and populated with data, it indicates that the service has been billed/invoiced (meaning that an invoice has been generated and posted to A/R for that service). If a service is associated with multiple posted invoices, all invoice IDs are reported in the order of the oldest to the newest invoice.
![]() NOTE: This data field is only populated for program services that are linked to configured billing types. AWARDS hard coded billing types/program services are not included.
NOTE: This data field is only populated for program services that are linked to configured billing types. AWARDS hard coded billing types/program services are not included.
Return to the top of the Service Contacts ReportBuilder FAQs list.
How do I build a service contacts report that excludes amended progress note entries?
Currently we do not have a way to filter amendments out of Service Contact ReportBuilders. One possible workaround though, is to have staff always enter specific text in their amendments (for example, preceding the note text with "Amendment:") so that you could filter out any notes with that text. Another option is to use Services > Utilization Reports > Progress Notes Report instead of a ReportBuilder. This will show you the progress notes portion of the services data collection for the period of time you're looking at, without reporting out on amendments separately.
Return to the top of the Service Contacts ReportBuilder FAQs list.
Is there a way to see which service contacts have been electronically signed?
Yes, all of the Services menu's ReportBuilders have an "E-Signed" variable available which, when included in the report, will display "Yes" for records that have been electronically signed. In addition, the Client History Report will indicate whether an electronic signature has been placed on a client's progress notes, contacts log entries, group notes, service plans, and certain FormBuilder forms.
Return to the top of the Service Contacts ReportBuilder FAQs list.
What do the letters in a "Record ID" mean in services-related ReportBuilders?
The Record ID data variable available for inclusion in services-related ReportBuilders includes a unique ID for each record. As part of that ID there is a preceding letter code that also identifies the type of each services record; specifically:
P = Progress Note
C = Contacts Log Record
S = Supportive Services Checklist
G = Group Note
A = Group Attendance Record
![]() NOTE: In the event that there is a combined Contacts Log/Progress Note record included in the report data, the Record ID reflects the Contacts Log ID/Progress Note ID.
NOTE: In the event that there is a combined Contacts Log/Progress Note record included in the report data, the Record ID reflects the Contacts Log ID/Progress Note ID.
Similarly, a combined Group Attendance/Group Note record reflects the Group Attendance ID/Group Note ID. When a record ID has both A and G codes, it means that the group was scheduled (using the Group Schedule Setup functionality), the individual was an expected attendee in that group, and he/she was present. (Keep in mind that if a record ID only has a G code, it does not mean that there is no attendance record; it only means that the group was not scheduled using Group Schedule Setup, and therefore there are no expected attendees though this individual did attend.)
Return to the top of the Service Contacts ReportBuilder FAQs list.
If multiple electronic signatures have been applied to a record, the ReportBuilder's Locked by E-Sign Date data variable populates with the date on which the first of those signatures was applied. It is that date on which the record was locked from further edits.
Return to the top of the Service Contacts ReportBuilder FAQs list.
Who displays as the group leader on ReportBuilders containing data from scheduled group activities?
The name of the ReportBuilder data variable used to report on a group's leader, as well as where the group leader information is pulled from, varies based on whether a group note has been written. Specifically:
![]() In the Service Contacts ReportBuilder - The "Leader" data variable displays the scheduled group leader (set under Services > Group Schedule Setup > Group Schedules), unless there has been a group note written for the group. In such cases the Leader data variable will reflect the writer of the group note.
In the Service Contacts ReportBuilder - The "Leader" data variable displays the scheduled group leader (set under Services > Group Schedule Setup > Group Schedules), unless there has been a group note written for the group. In such cases the Leader data variable will reflect the writer of the group note.
![]() In the Group Activity Attendance ReportBuilder - The "Leader" data variable displays the scheduled group leader (set under Services > Group Schedule Setup > Group Schedules), unless there has been a group note written for the group. In such cases the Leader data variable will reflect the writer of the group note.
In the Group Activity Attendance ReportBuilder - The "Leader" data variable displays the scheduled group leader (set under Services > Group Schedule Setup > Group Schedules), unless there has been a group note written for the group. In such cases the Leader data variable will reflect the writer of the group note.
![]() In the Group Notes ReportBuilder - There is no data variable for "Leader" because AWARDS assumes that the writer of the group note is the group leader. Activities entered without group notes are not included in the report.
In the Group Notes ReportBuilder - There is no data variable for "Leader" because AWARDS assumes that the writer of the group note is the group leader. Activities entered without group notes are not included in the report.
Return to the top of the Service Contacts ReportBuilder FAQs list.
Activity records are created for group notes only when the user has recorded a note for a scheduled group. Notes written for unscheduled groups do not create activity records, so the activity information for them will be blank.
Return to the top of the Service Contacts ReportBuilder FAQs list.
Why isn't a note written on a certain date appearing in my ReportBuilder report for that date?
For each note three distinct dates are captured - the contact date, the date written, and the date last modified. While the label on the progress note itself always refers to "date written," the system relies on behind-the-scenes preferences to determine whether what is shown there is in fact the date written, or is instead the date last modified. In the case of service contact ReportBuilders through, it will always show you the data that you request. If you choose to include the "Date Written" data variable for example, it will always show you the true value for when the note was written. If you are seeing a discrepancy between the date written on the note and the date written for that note in a ReportBuilder, it is an indication that your database has been set up to display the date last modified on progress notes rather than the true date written.
If you would like us to adjust how progress notes work in your database so that the date written always shows you the true written on date on both the note and in ReportBuilders, please contact the Help Desk; otherwise, you may choose to change the selections in your ReportBuilder report from "Date Written" to "Date Modified" - doing so would result in your report and the notes display being consistent.
Return to the top of the Service Contacts ReportBuilder FAQs list.
https://demodb.footholdtechnology.com/help/?11577
