|   |
| |
To schedule a charting timetable event for a client, complete the following steps from the Schedule Calendar Event page displayed after clicking a date on the Calendar:
![]() TIP: In order to schedule chart events, you must have the following permissions:
TIP: In order to schedule chart events, you must have the following permissions:
Display Any Chart Records Buttons
Display Chart Records Services - Individual Button
![]() TIP: Chart events cannot be scheduled when using Availability view.
TIP: Chart events cannot be scheduled when using Availability view.
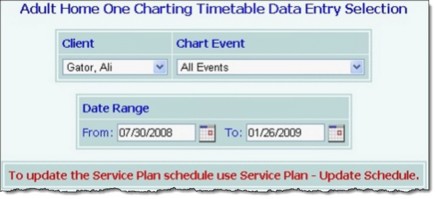
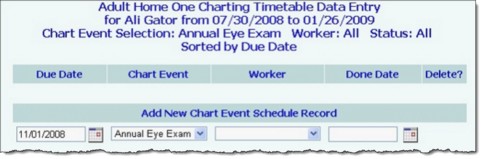
Any existing charting timetable records for the selected client, event, and date range are displayed at the top of this page.
![]() TIP: The date entered must fall within the date range entered on the previous page (during step 4).
TIP: The date entered must fall within the date range entered on the previous page (during step 4).
![]() TIP: The date entered must fall within the date range entered on the previous page (during step 4).
TIP: The date entered must fall within the date range entered on the previous page (during step 4).
![]() TIP: In some cases you may need to adjust your current Calendar settings before your new appointment/event will be included in the Calendar display.
TIP: In some cases you may need to adjust your current Calendar settings before your new appointment/event will be included in the Calendar display.
![]() NOTE: All chart events are scheduled on the Calendar for 8:00 AM.
NOTE: All chart events are scheduled on the Calendar for 8:00 AM.
The process of scheduling a charting timetable event is now complete.
![]() TIP: Charting timetable event records can also be entered and updated using the Services - Individual module's Charting Timetable feature. For more information, click here.
TIP: Charting timetable event records can also be entered and updated using the Services - Individual module's Charting Timetable feature. For more information, click here.
https://demodb.footholdtechnology.com/help/?10160
