|   |
| |
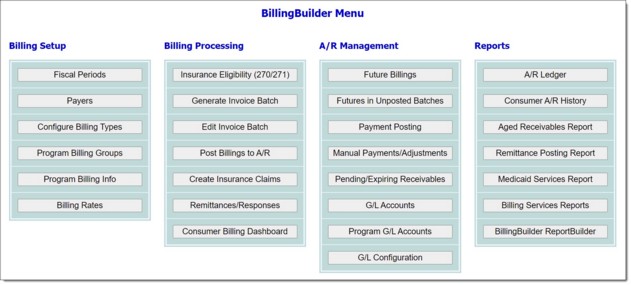
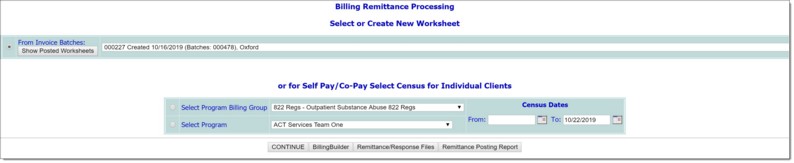
After batches have been posted, invoices can no longer be edited. Sometimes, however, there will be a need to reverse or adjust a payment once it has been posted. This can be done directly in AWARDS by looking up the TCN Claim Control Number and invoice information, adding the reversed or adjusted invoices to a new or existing batch, and then creating another claim file.
To submit a reversal or adjustment, complete the following steps:

![]() TIP: Alternatively, you can also create a new, empty batch in which to add the reversed or adjusted invoices. To use this method, first create an empty batch using the procedure outlined under Generating Invoices. Select "Generate Empty Batch" from the Billing Action drop-down list in step 7 of the procedure. Once the empty batch is created, select that batch to use in this step, and proceed with step 18.
TIP: Alternatively, you can also create a new, empty batch in which to add the reversed or adjusted invoices. To use this method, first create an empty batch using the procedure outlined under Generating Invoices. Select "Generate Empty Batch" from the Billing Action drop-down list in step 7 of the procedure. Once the empty batch is created, select that batch to use in this step, and proceed with step 18.
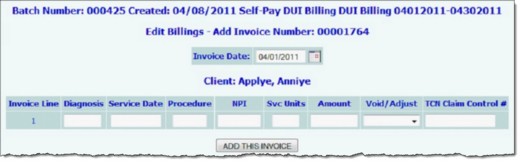
![]() TIP: If a reversal (or "void") is being processed, the Amount entered should be the same amount that was on the original invoice. If an adjustment is being processed, the Amount entered should be the new amount to appear on the invoice.
TIP: If a reversal (or "void") is being processed, the Amount entered should be the same amount that was on the original invoice. If an adjustment is being processed, the Amount entered should be the new amount to appear on the invoice.
The process of working with reversals and adjustments is now complete.
https://demodb.footholdtechnology.com/help/?11575
