|   |
| |
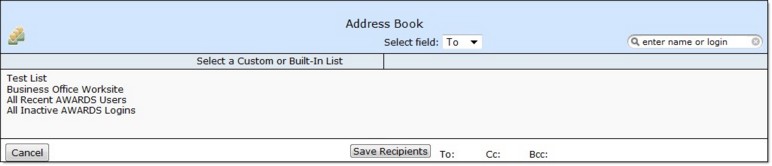
The Messages module Custom Lists feature is used to create and manage lists of like AWARDS users to facilitate distribution of messages to groups of people. Those lists can then be accessed from within the address book while specifying recipients during the message composition process.
Creation of custom lists, as well as their maintenance or deletion, are discussed in detail in the sections that follow.
Updating or Deleting a Custom List
![]() TIP: In addition to allowing for custom lists, the AWARDS Messages module contains several built-in "counselor" and "worksite" distribution lists. These built-in lists, which cannot be changed by users, are generated automatically.
TIP: In addition to allowing for custom lists, the AWARDS Messages module contains several built-in "counselor" and "worksite" distribution lists. These built-in lists, which cannot be changed by users, are generated automatically.
Users are included on the COUNSELOR list for a particular program if they have chart access to that program as well as a caseload there, or if they are set up as the program director for the program using the Configure Administration component of the System Setup module's Agency Program Information feature. They must also have logged into AWARDS within the last 30 days.
Users are included on the WORKSITE list for a particular program if they are scheduled to work at that site within their work schedules, as entered in the Human Resources module or using the Work Schedule module or the Attendance module's Work Schedules feature (when available). They must also have logged into AWARDS within the last 30 days.
To create a custom list, complete the following steps from within the Messages module:
![]()
![]()

![]() TIP: The name specified must also be unique. If there is already a list with the name you specify here, a red exclamation point is displayed and you cannot proceed until the name is changed; otherwise, a green checkbox icon is displayed next to the name you have entered.
TIP: The name specified must also be unique. If there is already a list with the name you specify here, a red exclamation point is displayed and you cannot proceed until the name is changed; otherwise, a green checkbox icon is displayed next to the name you have entered.
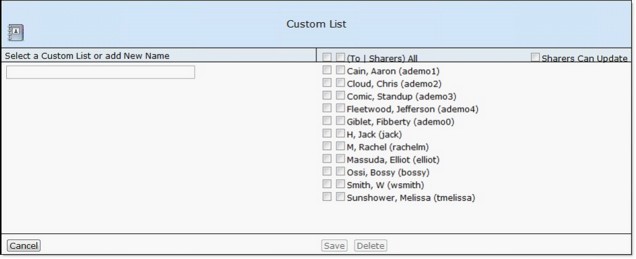
![]() NOTE: In order to prevent messages from going to individuals who do not use the AWARDS system on a regular basis, only "recent" users - those who have logged into the system within the last 30 days - are available for inclusion in custom lists.
NOTE: In order to prevent messages from going to individuals who do not use the AWARDS system on a regular basis, only "recent" users - those who have logged into the system within the last 30 days - are available for inclusion in custom lists.
![]() TIP: To select all users, click the To checkbox at the top of the (To|Sharers) column. Conversely, uncheck that box to de-select all users.
TIP: To select all users, click the To checkbox at the top of the (To|Sharers) column. Conversely, uncheck that box to de-select all users.
The process of creating a custom list is now complete.
Updating or Deleting a Custom List
To delete or make changes to an existing custom list, complete the following steps:
![]()
![]()
![]() Update the Custom List - With the list selected on the left side of the page, make changes to its settings by selecting or de-selecting the users to be included in the list (To), and those that are to share the list (Sharers). If necessary, check or uncheck the Sharers Can Update checkbox, and then click Save to save your changes.
Update the Custom List - With the list selected on the left side of the page, make changes to its settings by selecting or de-selecting the users to be included in the list (To), and those that are to share the list (Sharers). If necessary, check or uncheck the Sharers Can Update checkbox, and then click Save to save your changes.
![]() Delete the Custom List - Click Delete. A confirmation message is displayed. Click OK. The custom list is deleted and the updated Custom List page is displayed.
Delete the Custom List - Click Delete. A confirmation message is displayed. Click OK. The custom list is deleted and the updated Custom List page is displayed.
The process of updating or deleting a custom list is now complete.
https://demodb.footholdtechnology.com/help/?11615
