|   |
| |
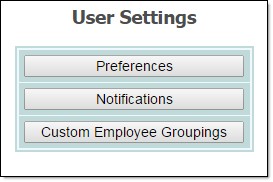
The Calendar-related functionality detailed here refers to the "old" version of the Calendar, available prior to September 2020. Custom employee groupings are not yet available for use with the new/revamped Calendar, but we anticipate that change will be deployed with our next round of enhancements.
To create and save a new employee grouping, or to make changes to a previously saved employee grouping, complete the following steps:
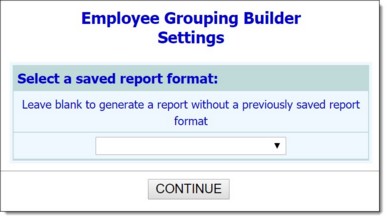
![]() Create a new grouping - To create a new employee grouping, leave the saved report format drop-down blank.
Create a new grouping - To create a new employee grouping, leave the saved report format drop-down blank.
![]() Work with a previously saved grouping - To work with a previously saved employee grouping, for the purposes of modifying or deleting it, select the grouping from this drop-down. When using this method, you can immediately view the grouping without changing any settings. Alternately, you can modify the settings of the grouping (or delete it entirely) by checking off the available Provide option to modify settings of saved report format checkbox before proceeding with step 4.
Work with a previously saved grouping - To work with a previously saved employee grouping, for the purposes of modifying or deleting it, select the grouping from this drop-down. When using this method, you can immediately view the grouping without changing any settings. Alternately, you can modify the settings of the grouping (or delete it entirely) by checking off the available Provide option to modify settings of saved report format checkbox before proceeding with step 4.
If you selected an existing employee grouping and have NOT chosen to view/modify the settings of that grouping, you are now taken directly to a read-only report version of the employee grouping information. At this time, individual detail and/or summary table content can be hidden or sorted as needed. The grouping information can also be printed or exported to Microsoft Excel. For more information on working with grouping contents, click here. The remaining steps do not apply.
In all other instances, the Options page is displayed. Continue with step 5.
![]() TIP: If you selected an existing employee grouping in step 4 for the purposes of deleting it, skip ahead to step 8. Steps 5 through 7 need not be completed in that case.
TIP: If you selected an existing employee grouping in step 4 for the purposes of deleting it, skip ahead to step 8. Steps 5 through 7 need not be completed in that case.
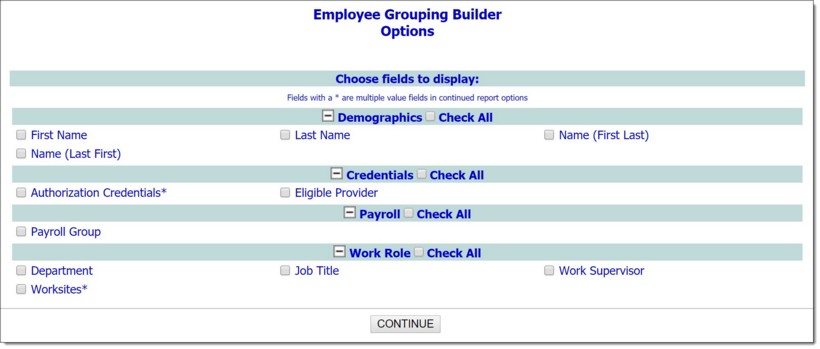
![]() TIP: The options found on this page are the same as those utilized for ReportBuilders throughout AWARDS. For more information on each option, please click here.
TIP: The options found on this page are the same as those utilized for ReportBuilders throughout AWARDS. For more information on each option, please click here.
![]() View the employee grouping - To view the employee grouping resulting from the settings specified on this and the previous pages, click DISPLAY REPORT. A read-only report version of the grouping contents are displayed and can be worked with as needed using the content options detailed here, including sorting, printing, or exporting the information to Microsoft Excel.
View the employee grouping - To view the employee grouping resulting from the settings specified on this and the previous pages, click DISPLAY REPORT. A read-only report version of the grouping contents are displayed and can be worked with as needed using the content options detailed here, including sorting, printing, or exporting the information to Microsoft Excel.
![]() IMPORTANT! We strongly recommend that you view the employee grouping prior to saving it, whether you are creating that grouping now or simply making modifications to an existing grouping. Doing so enables you to confirm that the grouping contains the intended employees, and that no changes are needed before proceeding with saving.
IMPORTANT! We strongly recommend that you view the employee grouping prior to saving it, whether you are creating that grouping now or simply making modifications to an existing grouping. Doing so enables you to confirm that the grouping contains the intended employees, and that no changes are needed before proceeding with saving.
![]() Save the employee grouping - To save the employee grouping, whether you have just created it from scratch or have modified an existing grouping, click CREATE EMPLOYEE GROUPING. The Create Employee Grouping dialog box is displayed. Configure or make changes to the fields and options on the dialog box (each of which is described below) as needed, and then click Create Employee Grouping to proceed with the save. The employee grouping is saved and the Options - Continued page is re-displayed.
Save the employee grouping - To save the employee grouping, whether you have just created it from scratch or have modified an existing grouping, click CREATE EMPLOYEE GROUPING. The Create Employee Grouping dialog box is displayed. Configure or make changes to the fields and options on the dialog box (each of which is described below) as needed, and then click Create Employee Grouping to proceed with the save. The employee grouping is saved and the Options - Continued page is re-displayed.
- Report Format Title - When saving a new employee grouping, type the name for that grouping in this field. When working with a previously saved employee grouping, the title defaults to the name of that grouping. To save the modifications as a new group and to leave the original unchanged, enter a new title in this field. If the default title is not changed in such cases, the modifications being saved are applied to the original.
![]() TIP: Please keep in mind that only the user who originally saved an employee grouping and individuals who can save groupings for all users can modify that grouping. Others can save modified employee groupings under a new name, but cannot apply modifications to the original grouping.
TIP: Please keep in mind that only the user who originally saved an employee grouping and individuals who can save groupings for all users can modify that grouping. Others can save modified employee groupings under a new name, but cannot apply modifications to the original grouping.
![]() TIP: We recommend that the title used be indicative of the employee group so that it is easily identifiable in the groupings selection list when working with the Calendar.
TIP: We recommend that the title used be indicative of the employee group so that it is easily identifiable in the groupings selection list when working with the Calendar.
- Create Employee Grouping for - Click one of the available radio buttons to specify who the employee grouping should be available to. Options are:
![]() Yourself - When selected, only you will have the ability to use or modify this employee grouping in the future.
Yourself - When selected, only you will have the ability to use or modify this employee grouping in the future.
![]() All Staff - When selected, all staff will have the ability to use this employee grouping in the future; however, only you and other individuals with the ability to save groupings for all staff will be able to modify or delete it.
All Staff - When selected, all staff will have the ability to use this employee grouping in the future; however, only you and other individuals with the ability to save groupings for all staff will be able to modify or delete it.
![]() NOTE: In order to save employee groupings for all staff, you must have the Create Employee Groupings for all Staff permission assigned under System Setup > Permissions Maintenance, or be in an executive-level user group. Specifically, in a single-agency AWARDS database, only individuals with this permission and members of the "System Administrator" and "Executive Officer" user groups have the ability to save employee groupings to be used by others. In a multi-agency/HMIS AWARDS database, the option to save groupings for other users is available by permission and to the "System Administrator," "CoC Executive Officer," "CoC Executive Support Staff," and "Agency Executive Officer" user groups. All others can only save employee groupings for themselves.
NOTE: In order to save employee groupings for all staff, you must have the Create Employee Groupings for all Staff permission assigned under System Setup > Permissions Maintenance, or be in an executive-level user group. Specifically, in a single-agency AWARDS database, only individuals with this permission and members of the "System Administrator" and "Executive Officer" user groups have the ability to save employee groupings to be used by others. In a multi-agency/HMIS AWARDS database, the option to save groupings for other users is available by permission and to the "System Administrator," "CoC Executive Officer," "CoC Executive Support Staff," and "Agency Executive Officer" user groups. All others can only save employee groupings for themselves.
![]() Delete the employee grouping - To delete this employee grouping, click DELETE EMPLOYEE GROUPING. A confirmation message is displayed. Click OK to proceed with the deletion.
Delete the employee grouping - To delete this employee grouping, click DELETE EMPLOYEE GROUPING. A confirmation message is displayed. Click OK to proceed with the deletion.
![]() TIP: Keep in mind that if this was an employee grouping that had been saved for all staff, deleting it removes access to that grouping for everyone, not just yourself. You may want to consider notifying impacted staff of the deletion if appropriate.
TIP: Keep in mind that if this was an employee grouping that had been saved for all staff, deleting it removes access to that grouping for everyone, not just yourself. You may want to consider notifying impacted staff of the deletion if appropriate.
The process of creating or maintaining an employee grouping is now complete.
https://demodb.footholdtechnology.com/help/?11965
