|   |
| |
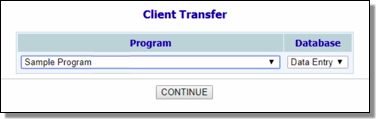
To view a read-only client transfers report, complete the following steps from the AWARDS Home screen:
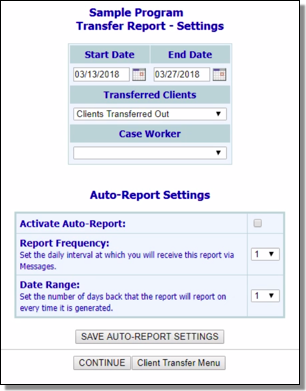
![]() Clients Transferred Out - When this option is selected the report includes only those clients who transferred out of the selected program.
Clients Transferred Out - When this option is selected the report includes only those clients who transferred out of the selected program.
![]() Clients Transferred In - When this option is selected the report includes only those clients who transferred into the selected program.
Clients Transferred In - When this option is selected the report includes only those clients who transferred into the selected program.
![]() All Transferred Clients - When this option is selected the report includes all transfers for the selected program, regardless of whether they are transfers into or out of that program.
All Transferred Clients - When this option is selected the report includes all transfers for the selected program, regardless of whether they are transfers into or out of that program.
![]() NOTE: When the report is being run for "All Agency Programs," the Transferred Clients selection must be "All Transferred Clients." The other two selection options are not available in such cases.
NOTE: When the report is being run for "All Agency Programs," the Transferred Clients selection must be "All Transferred Clients." The other two selection options are not available in such cases.
![]() NOTE: Clients with no assigned case worker are listed as "unassigned" in the client transfers report.
NOTE: Clients with no assigned case worker are listed as "unassigned" in the client transfers report.
![]() TIP: If you do not want to set up the auto-report functionality at this time, skip to step 10.
TIP: If you do not want to set up the auto-report functionality at this time, skip to step 10.
![]() Activate Auto-Report - Click this checkbox to indicate that you would like to use the auto-report feature.
Activate Auto-Report - Click this checkbox to indicate that you would like to use the auto-report feature.
![]() Report Frequency - Click this drop-down arrow and select the frequency (in days) at which you would like to receive the client transfers report; for example, select "1" if you would like to receive the report daily or "30" if you would like to receive the report around once a month.
Report Frequency - Click this drop-down arrow and select the frequency (in days) at which you would like to receive the client transfers report; for example, select "1" if you would like to receive the report daily or "30" if you would like to receive the report around once a month.
![]() Date Range - Click this drop-down arrow and select the number of days to be included in the report from the date on which it is sent; for example, select "1" if the report should only include transfers that occurred on the day before the auto-report is generated.
Date Range - Click this drop-down arrow and select the number of days to be included in the report from the date on which it is sent; for example, select "1" if the report should only include transfers that occurred on the day before the auto-report is generated.
![]() TIP: To change the saved settings at any time, simply return to this page, make any needed setting adjustments, and then click the SAVE button again.
TIP: To change the saved settings at any time, simply return to this page, make any needed setting adjustments, and then click the SAVE button again.
This page contains information on all transfers meeting the criteria entered on the report settings page. For each of those transfers it includes the client name, transfer date, transferring-out program and/or transferring-in program, and case worker. The report also contains a total transfers count, an Excel File link that can be used to export the report information to Microsoft Excel, and a Printable Version button.
The process of viewing a client transfers report is now complete.
https://demodb.footholdtechnology.com/help/?11117
