|   |
| |
To enter or update your work schedule information, complete the following steps:
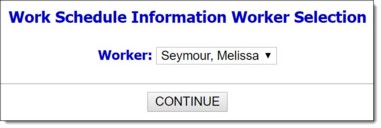
The Worker selection on this page displays your name and cannot be changed.
![]() TIP: Using the Work Schedules feature from the navigation bar's user name drop-down you can only update your own work schedule. If you have access to the Human Resources module you can update the work schedules for other staff there, using either the Staff Information feature, or the Work Schedules feature.
TIP: Using the Work Schedules feature from the navigation bar's user name drop-down you can only update your own work schedule. If you have access to the Human Resources module you can update the work schedules for other staff there, using either the Staff Information feature, or the Work Schedules feature.
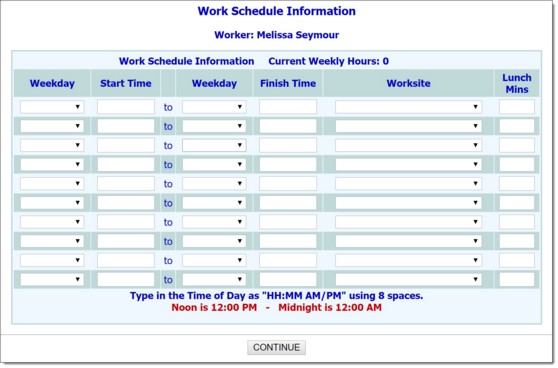
![]() Weekday / Start Time - Click the first Weekday drop-down arrow and select the starting weekday of the shift being entered or updated. In the corresponding Start Time field, type or make changes to the time at which you are scheduled to begin work on the selected day (using HH:MM format followed by a space and AM or PM).
Weekday / Start Time - Click the first Weekday drop-down arrow and select the starting weekday of the shift being entered or updated. In the corresponding Start Time field, type or make changes to the time at which you are scheduled to begin work on the selected day (using HH:MM format followed by a space and AM or PM).
![]() Weekday / Finish Time - Click the second Weekday drop-down arrow and select the ending weekday of this shift. In the corresponding End Time field, type or make changes to the time at which you are scheduled to end work on the selected day (using HH:MM format followed by a space and AM or PM).
Weekday / Finish Time - Click the second Weekday drop-down arrow and select the ending weekday of this shift. In the corresponding End Time field, type or make changes to the time at which you are scheduled to end work on the selected day (using HH:MM format followed by a space and AM or PM).
![]() Worksite - Click the Worksite drop-down arrow and select the site at which you are to work during this shift.
Worksite - Click the Worksite drop-down arrow and select the site at which you are to work during this shift.
![]() TIP: Only ten lines are available when first entering a work schedule. If more lines are needed, enter the first ten records and click CONTINUE, then click DATA ENTRY and two additional lines are presented for data entry. Repeat this process as needed until all records are entered.
TIP: Only ten lines are available when first entering a work schedule. If more lines are needed, enter the first ten records and click CONTINUE, then click DATA ENTRY and two additional lines are presented for data entry. Repeat this process as needed until all records are entered.
![]() TIP: To make additional changes to the work schedule at this time, click DATA ENTRY to return to the Work Schedule Information data entry page.
TIP: To make additional changes to the work schedule at this time, click DATA ENTRY to return to the Work Schedule Information data entry page.
The process of entering or updating your work schedule is now complete.
https://demodb.footholdtechnology.com/help/?11922
