|   |
| |
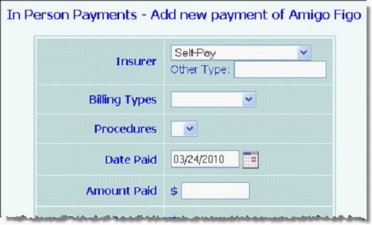
The In Person Payments feature can be used to enter self payments. To do so, complete the following steps:


This page contains a list of any previously entered in person payments for the selected client.
Some of the options on this page are dynamic, meaning that the selections they make available to you are based on other options you've set earlier in the page. As a result, please configure the options in the order in which they are described here.
→ Insurer - Click this drop-down arrow and select "Self-Pay."
→ Billing Types - Click this drop-down arrow and select the billing type. The types available here are based on the selected insurer.
→ Procedures - Click this drop-down arrow and select the procedure. The procedures available here are those associated with the selected billing type.
→ Date Paid - In this field, type the date on which the payment was made (using mm/dd/yyyy format).
→ Amount Paid - In this field, type the amount paid. If this is a partial payment, the balance is added to the read-only Outstanding Balance on this page after the payment record is saved (in step 11).
To print a receipt for the payment from this page, click Printable Receipt. To print a receipt at a later time, follow the steps under Printing a Payment Receipt.
The process of entering a self payment is now complete.
When the payment is saved an invoice is created for the client for the amount owed. This invoice can be accessed using the Billing Menu feature's Edit Invoice Batch component. For more information on using Edit Invoices, please refer to the BillingBuilder Processing Instruction Sheet.