|   |
| |
To enter, update, delete, or view a diet information record, complete the following steps from the AWARDS Home screen:
![]() TIP: If the diet info records to be worked with are for a former (discharged) client, first click the Archives toggle to the right of the client selection option.
TIP: If the diet info records to be worked with are for a former (discharged) client, first click the Archives toggle to the right of the client selection option.
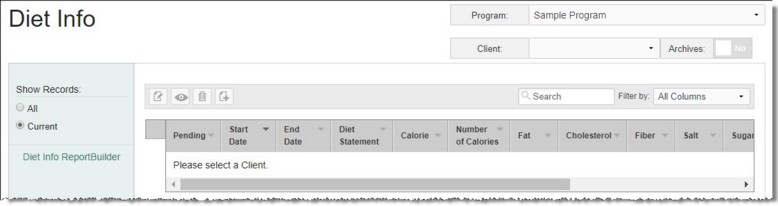
The index page is automatically refreshed to display any existing diet records for the selected individual.
![]() TIP: When working on the index page, records are easily accessible using the following tools and navigation features:
TIP: When working on the index page, records are easily accessible using the following tools and navigation features:
![]() "Show Records" display options - By default the index includes only current diet information records (those with a start date on or before today with no end date, or with an end date that is on or after today's date). To expand the display to all diet information records instead, click All under "Show Records" in the left-hand menu.
"Show Records" display options - By default the index includes only current diet information records (those with a start date on or before today with no end date, or with an end date that is on or after today's date). To expand the display to all diet information records instead, click All under "Show Records" in the left-hand menu.
![]() Sorting options - By default records in the index are sorted chronologically by date. Click a column header in the data table to sort the index by a different type of data. Click the heading again to reverse the sort.
Sorting options - By default records in the index are sorted chronologically by date. Click a column header in the data table to sort the index by a different type of data. Click the heading again to reverse the sort.
![]() Navigation options - 10 records are displayed on the page by default. To access records on subsequent pages of the index (when applicable), click the arrows in the bottom-right corner of the table. To display 25 or 50 records at a time, click the Show drop-down to the left of the record count, also in the bottom-right corner, and make a selection.
Navigation options - 10 records are displayed on the page by default. To access records on subsequent pages of the index (when applicable), click the arrows in the bottom-right corner of the table. To display 25 or 50 records at a time, click the Show drop-down to the left of the record count, also in the bottom-right corner, and make a selection.
Once you select records on the index, a count of how many total records are selected is displayed in the action bar. Selections are maintained while moving from one page of the index to the next; meaning, you can select records on the first page (showing records 1-10 by default) and move to the next page (displaying records 11-20) without losing the selections made on the first page. Links for Show all selected records and Uncheck All are available beneath the index table for easy navigation.
![]() Search and filtering options - A Search field is available on the action bar along with a corresponding Filter by drop-down list. To search the contents of the index (including those records not currently displayed on the page), enter a value in the Search field. The index is automatically updated as you type. To further narrow your search, use the Filter by selection to indicate whether the search should look at data in "All Columns" (the default) or a specific column. (Please note that the Search only looks at the content directly visible on the index. As a result, if any text is cut off in the display the search will only find results that match the portion you can currently see.)
Search and filtering options - A Search field is available on the action bar along with a corresponding Filter by drop-down list. To search the contents of the index (including those records not currently displayed on the page), enter a value in the Search field. The index is automatically updated as you type. To further narrow your search, use the Filter by selection to indicate whether the search should look at data in "All Columns" (the default) or a specific column. (Please note that the Search only looks at the content directly visible on the index. As a result, if any text is cut off in the display the search will only find results that match the portion you can currently see.)
Depending upon how many fields/options your agency's diet information records are configured to contain, the contents of the index table may be cut off on the right side of the page. To view the right edge of the table in such instances a scroll bar is provided for your convenience; however, please keep in mind that if you are working on a Mac that scroll bar will not be visible. If you have a touchpad or a touch mouse you can hover over the table and use that to move from left to right.
![]() ReporBuilder access - The Diet Info ReportBuilder link on the left-hand menu bar provides a shortcut to access the ReportBuilder for this feature. For instructions on using that ReportBuilder, click here.
ReporBuilder access - The Diet Info ReportBuilder link on the left-hand menu bar provides a shortcut to access the ReportBuilder for this feature. For instructions on using that ReportBuilder, click here.
![]()
![]() Add a diet information record - To do so, click the add new icon from the action bar above the diet information table. A new data entry page is displayed. Configure the fields and options on this page as necessary, and then click Save. The diet information record is saved, and a confirmation page is displayed.
Add a diet information record - To do so, click the add new icon from the action bar above the diet information table. A new data entry page is displayed. Configure the fields and options on this page as necessary, and then click Save. The diet information record is saved, and a confirmation page is displayed.
![]() TIP: For more information on each field/option available on the data entry page, see Diet Information Fields / Options.
TIP: For more information on each field/option available on the data entry page, see Diet Information Fields / Options.
![]()
![]() Update an existing diet information record - To do so, click the record to be updated, or click the checkbox to the left of that record and then click the edit icon from the action bar above the diet information table. The data entry page is displayed. Make changes to the information on this page as needed, and then click Save. The diet information record is saved, and a confirmation page is displayed.
Update an existing diet information record - To do so, click the record to be updated, or click the checkbox to the left of that record and then click the edit icon from the action bar above the diet information table. The data entry page is displayed. Make changes to the information on this page as needed, and then click Save. The diet information record is saved, and a confirmation page is displayed.
![]() TIP: For more information on each field/option available on the data entry page, see Diet Information Fields / Options.
TIP: For more information on each field/option available on the data entry page, see Diet Information Fields / Options.
![]()
![]() View or print an existing diet information record - To do so, click the checkbox to the left the record to be viewed/printed, and then click the view icon from the action bar above the diet information table. A read-only version of the record is displayed and can be printed as needed using your browser's print option.
View or print an existing diet information record - To do so, click the checkbox to the left the record to be viewed/printed, and then click the view icon from the action bar above the diet information table. A read-only version of the record is displayed and can be printed as needed using your browser's print option.
![]()
![]() Delete an existing diet information record - To do so, click the checkbox(es) to the left of the record(s) to be deleted, and then click the delete icon from the action bar above the diet information table. A confirmation message is displayed. Click OK to proceed with the deletion. The selected record(s) are deleted and the updated index is displayed.
Delete an existing diet information record - To do so, click the checkbox(es) to the left of the record(s) to be deleted, and then click the delete icon from the action bar above the diet information table. A confirmation message is displayed. Click OK to proceed with the deletion. The selected record(s) are deleted and the updated index is displayed.
![]() TIP: To close out a diet information record rather than delete it, update the record and enter a value in its End Date field. Doing so indicates that the diet is no longer in effect, while preserving the individual's diet information history.
TIP: To close out a diet information record rather than delete it, update the record and enter a value in its End Date field. Doing so indicates that the diet is no longer in effect, while preserving the individual's diet information history.
![]()
![]() Return to the Diet Information index - To do so, click the To Index icon from the action bar while working in a diet info record to return to the index page. You can also return to the index page at any time by clicking Diet Info from the breadcrumbs trail below the AWARDS navigation bar.
Return to the Diet Information index - To do so, click the To Index icon from the action bar while working in a diet info record to return to the index page. You can also return to the index page at any time by clicking Diet Info from the breadcrumbs trail below the AWARDS navigation bar.
The process of working with diet information records is now complete.
https://demodb.footholdtechnology.com/help/?10638
