|   |
| |
Users with access to a client's face sheet can edit the information that is shown for File Names and Brief Descriptions, and can replace the attached files with new ones. If any edits are required to the files themselves, they must be made in the software application in which the files were created (for example, Adobe Acrobat or Microsoft Word).
To edit an attached file's information in AWARDS, complete the following steps:
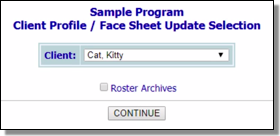
![]() TIP: To work with the records of a former (discharged) client, first click Roster Archives beneath the client selection option.
TIP: To work with the records of a former (discharged) client, first click Roster Archives beneath the client selection option.
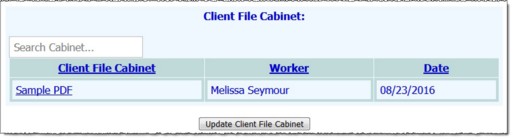
![]() TIP: Click a heading in the file table to sort the table contents by that column. Click that heading again to reverse the sort order. To sort by a secondary characteristic, press <SHIFT> and click on a second column heading.
TIP: Click a heading in the file table to sort the table contents by that column. Click that heading again to reverse the sort order. To sort by a secondary characteristic, press <SHIFT> and click on a second column heading.
![]() NOTE: This page contains a list of all files currently attached to the selected client's face sheet.
NOTE: This page contains a list of all files currently attached to the selected client's face sheet.
![]() TIP: Click a heading in the file table to sort the table contents by that column. Click that heading again to reverse the sort order. To sort by a secondary characteristic, press <SHIFT> and click on a second column heading.
TIP: Click a heading in the file table to sort the table contents by that column. Click that heading again to reverse the sort order. To sort by a secondary characteristic, press <SHIFT> and click on a second column heading.
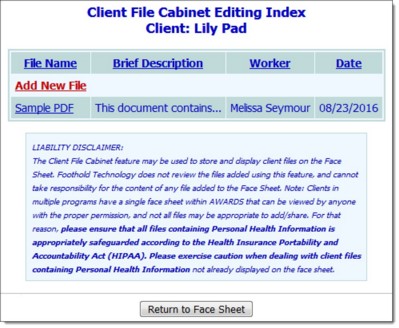
![]() NOTE: Upon completion of the attachment process, the name entered here will display as a link on the Client File Cabinet section of the client's face sheet. Users will click the link to open the file. As a result, the file name should be brief, descriptive, and less than 40 characters.
NOTE: Upon completion of the attachment process, the name entered here will display as a link on the Client File Cabinet section of the client's face sheet. Users will click the link to open the file. As a result, the file name should be brief, descriptive, and less than 40 characters.
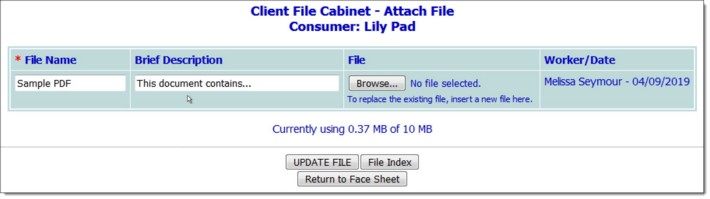
![]() TIP: This description will appear as a mouseover pop-up when a user moves his or her cursor over the link for this file, and must be less than 100 characters.
TIP: This description will appear as a mouseover pop-up when a user moves his or her cursor over the link for this file, and must be less than 100 characters.
![]() TIP: Keep the face sheet's remaining available space in mind when selecting which file to use, as each face sheet is limited to a total of 10MB by default, or to the maximum displayed on this page if it has been increased for your agency.
TIP: Keep the face sheet's remaining available space in mind when selecting which file to use, as each face sheet is limited to a total of 10MB by default, or to the maximum displayed on this page if it has been increased for your agency.
![]() TIP: The maximum individual file size is 8 MB. Accepted file types are DOC, XLS, PDF, JPG, BMP, and ZIP.
TIP: The maximum individual file size is 8 MB. Accepted file types are DOC, XLS, PDF, JPG, BMP, and ZIP.
The process of editing an attached file is now complete.
https://demodb.footholdtechnology.com/help/?12055
